
Monstera, like many plants, is susceptible to root rot if it is not growing in adequate conditions. The alarming part is that, unless it is caught early, root rot will end up killing your Monstera.
Find out all you need to know about Monstera root rot, including what signs to look for, what causes it, how to fix it and how to prevent it from happening again!
Monstera Root Rot
Monstera root rot is a disease caused by prolonged exposure to wet soil conditions. There are two sources of root rot:
- Overwatering.
- Harmful fungi in the soil that thrives on soggy soil.
Too much moisture in the soil for too long creates the perfect environment for a fungal infection to thrive, which will then cause your Monstera’s roots to begin to decay and rot.
Once root rot takes hold, it starts by destroying the plant’s roots and works its way up to the main stem.
The roots turn from white to a mushy or slimy dark brown, they will smell of rot (i.e., decay) and will eventually die. If not taken care of, root rot will kill a Monstera quickly.
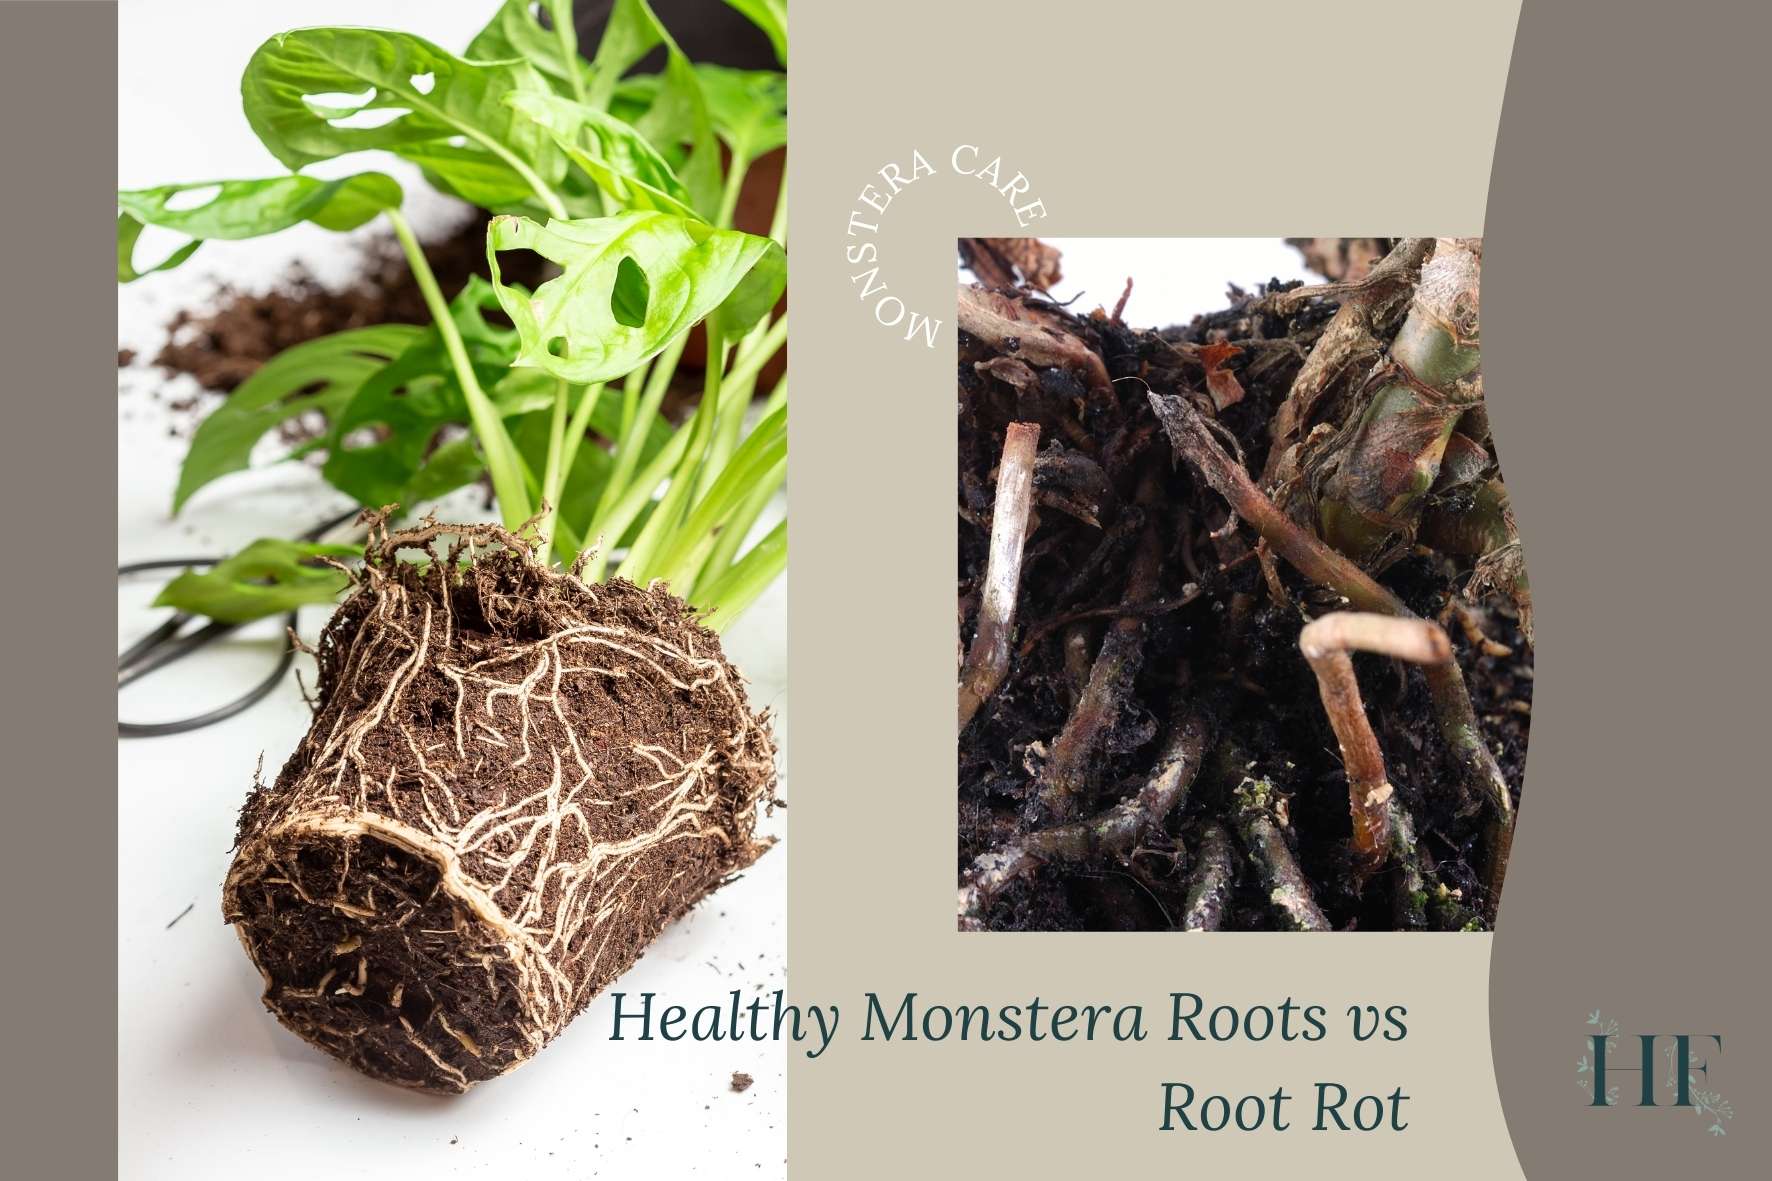
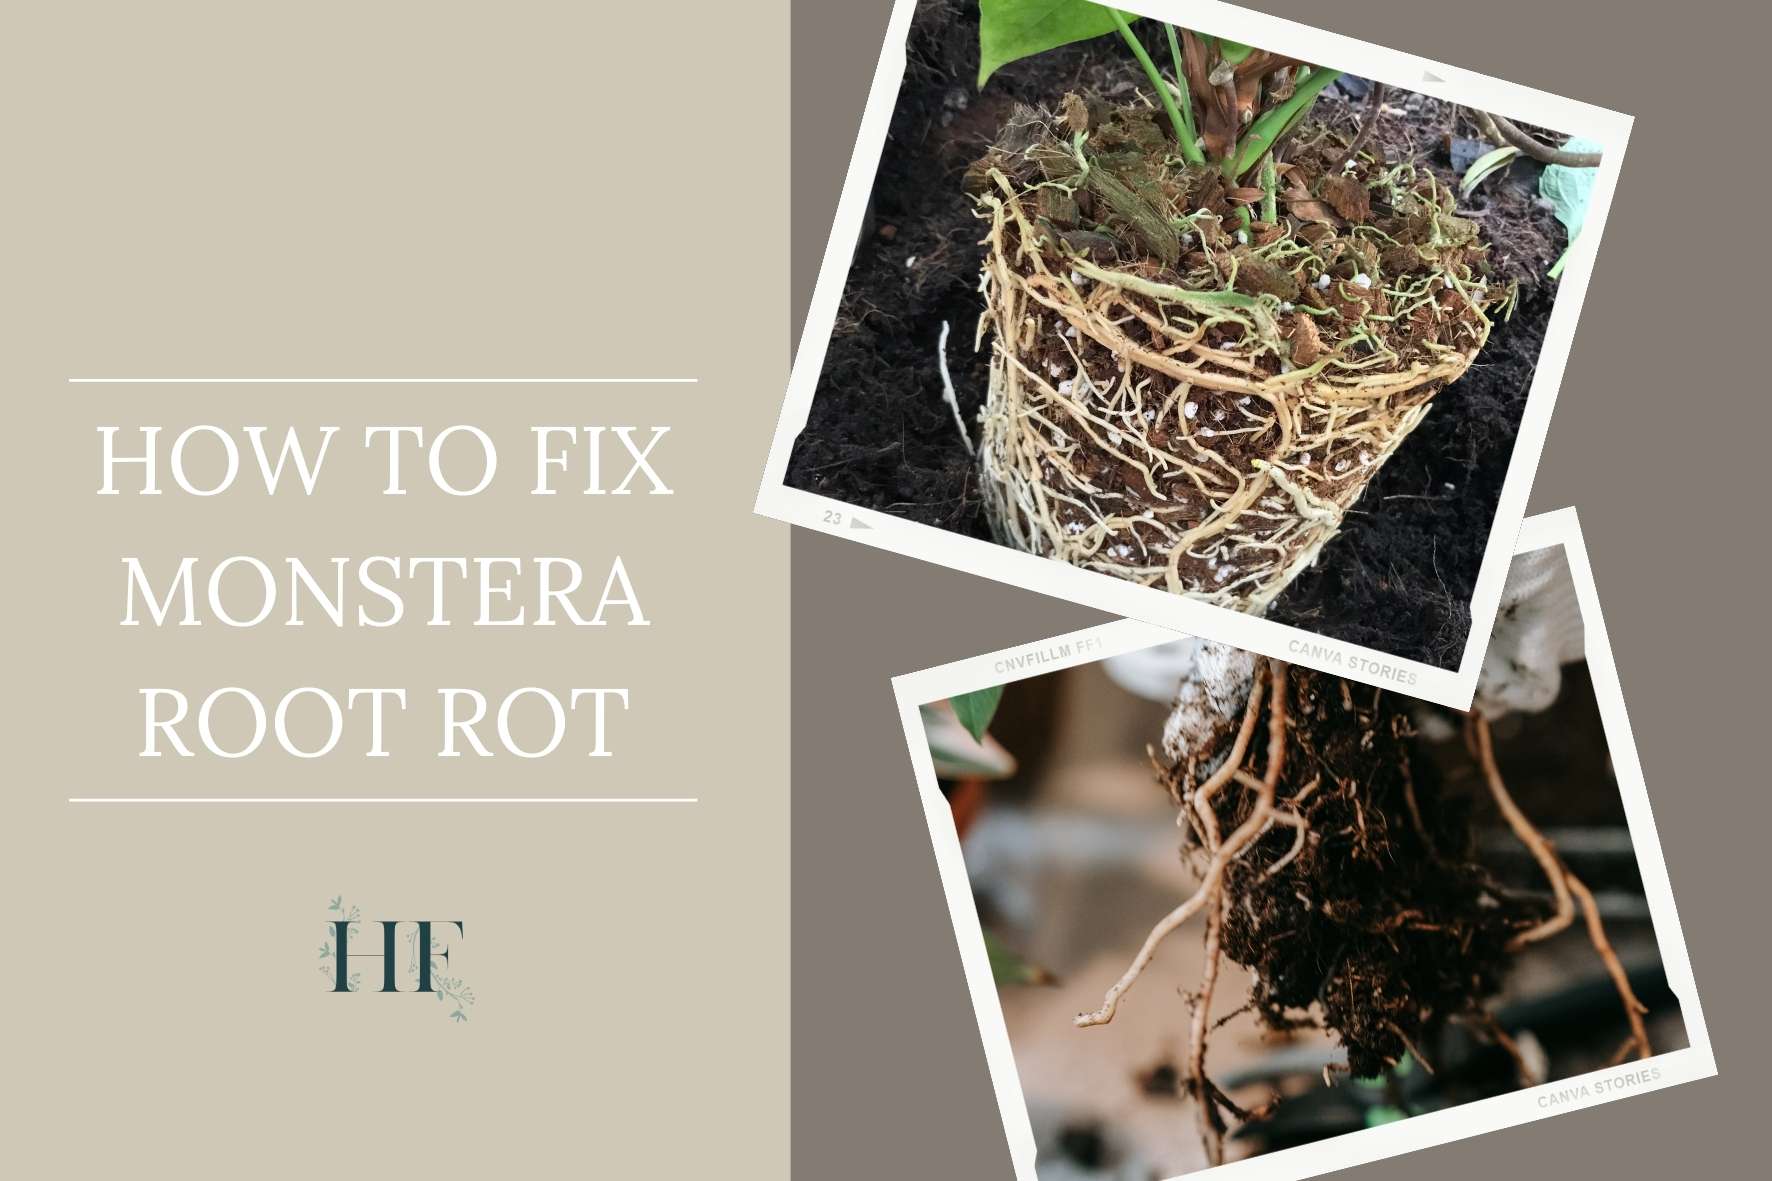
Root Rot vs Healthy Monstera Roots
Healthy Monstera roots are white and have a firm, springy feel. When your Monstera has root rot, its roots will turn brown or black. Also, they will feel mushy and slimy.
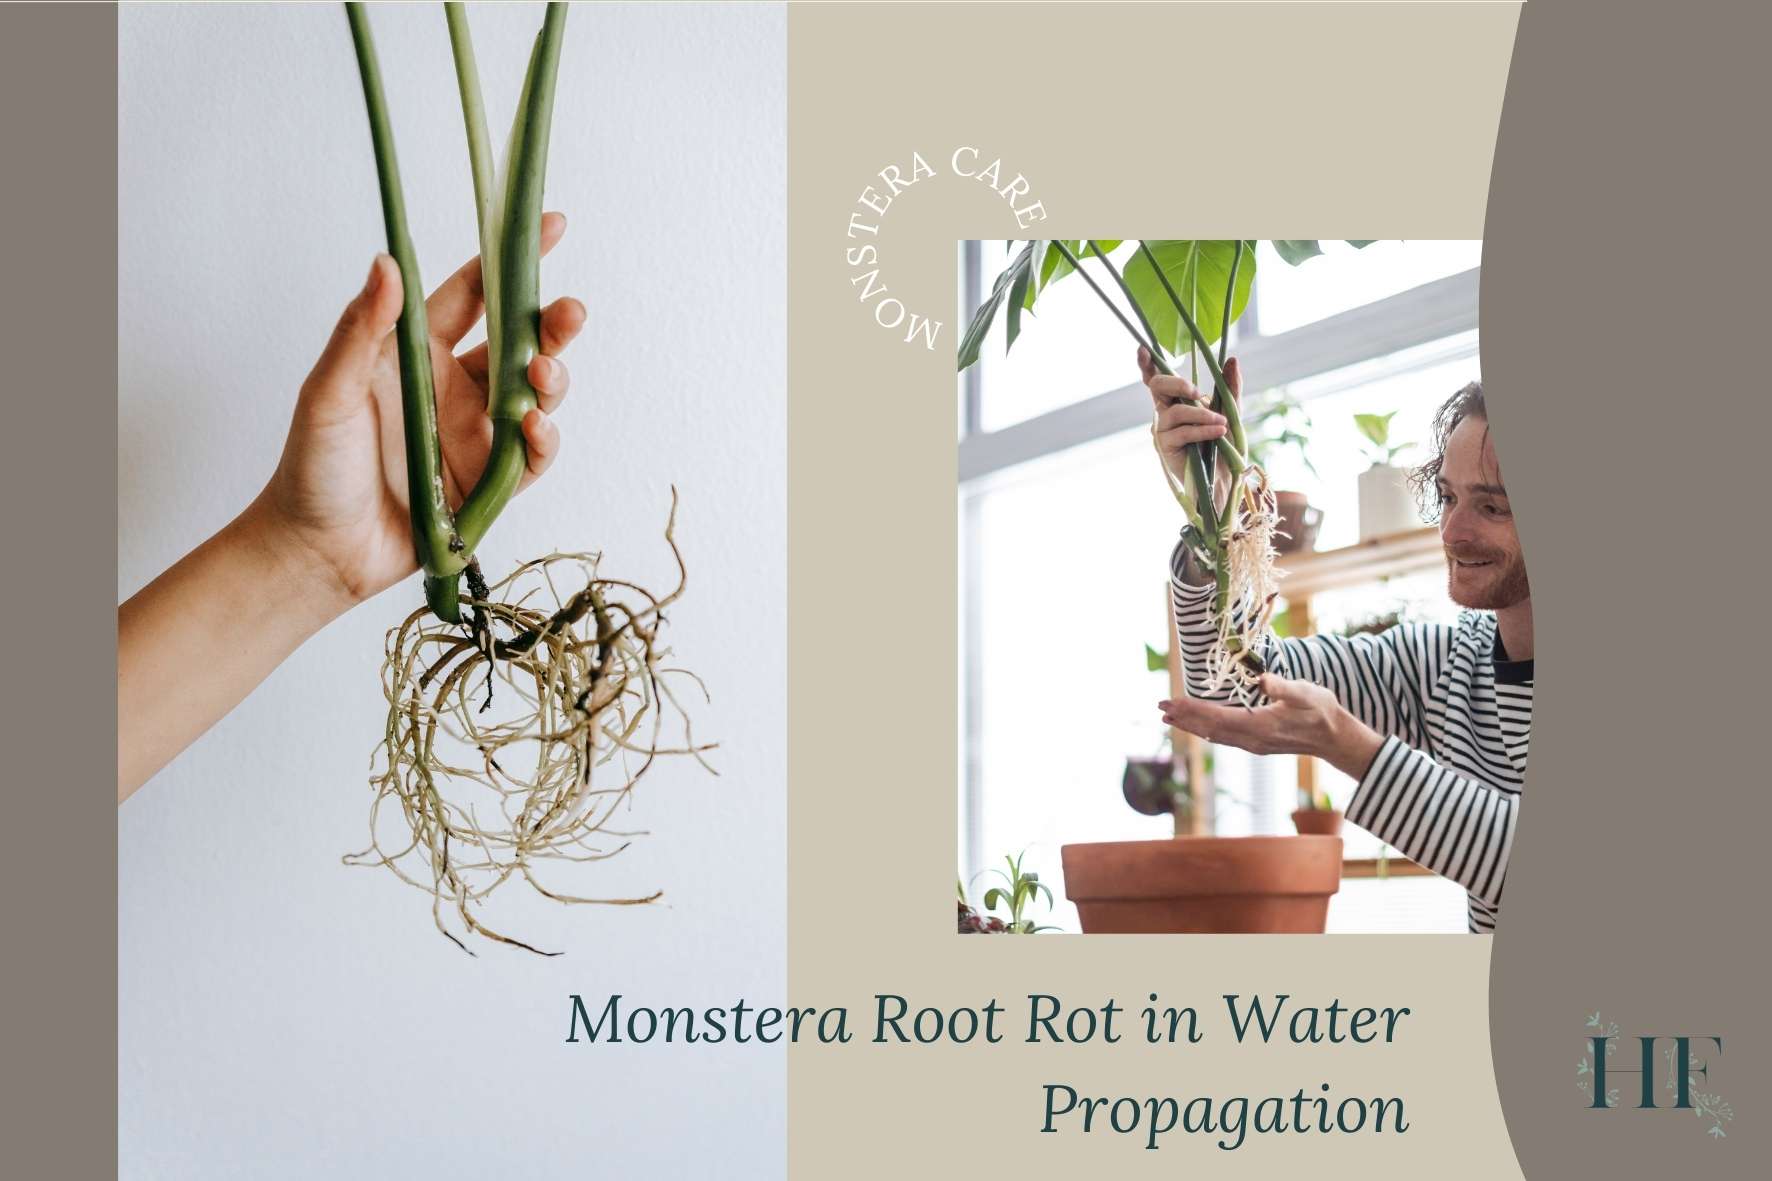
Monstera Root Rot in Water Propagation
Root rot can also occur in Monstera hydroponics if the water is not properly aerated. The only source of oxygen is what is dissolved in water and it will be depleted over time if the water is not changed.
If you ever notice black, soft or slimy roots in your Monstera cutting, prune them off immediately to stop root rot from spreading further.
For water propagation, here’s how to clean Monstera roots that have root rot:
- First, remove the plant from the vase and rinse all roots thoroughly under a strong stream of water.
- Next, trim off any dead or damaged roots.
- Then, wash the remaining roots with a 3% hydrogen peroxide solution to kill any remaining bacteria. (I will mention other natural fungicides later on if you’d rather use something else).
- Afterwards, rinse them with fresh water.
- Finally, disinfect the vase (I use white vinegar for this), rinse it and fill it with fresh clean water.
Frequently changing the water (once a week) and rinsing the roots can prevent root rot when you propagate Monstera in water.
Read also: Can You Grow Monstera in Water? And for How Long? and A Guide to Monstera Propagation in Soil, Water and more!
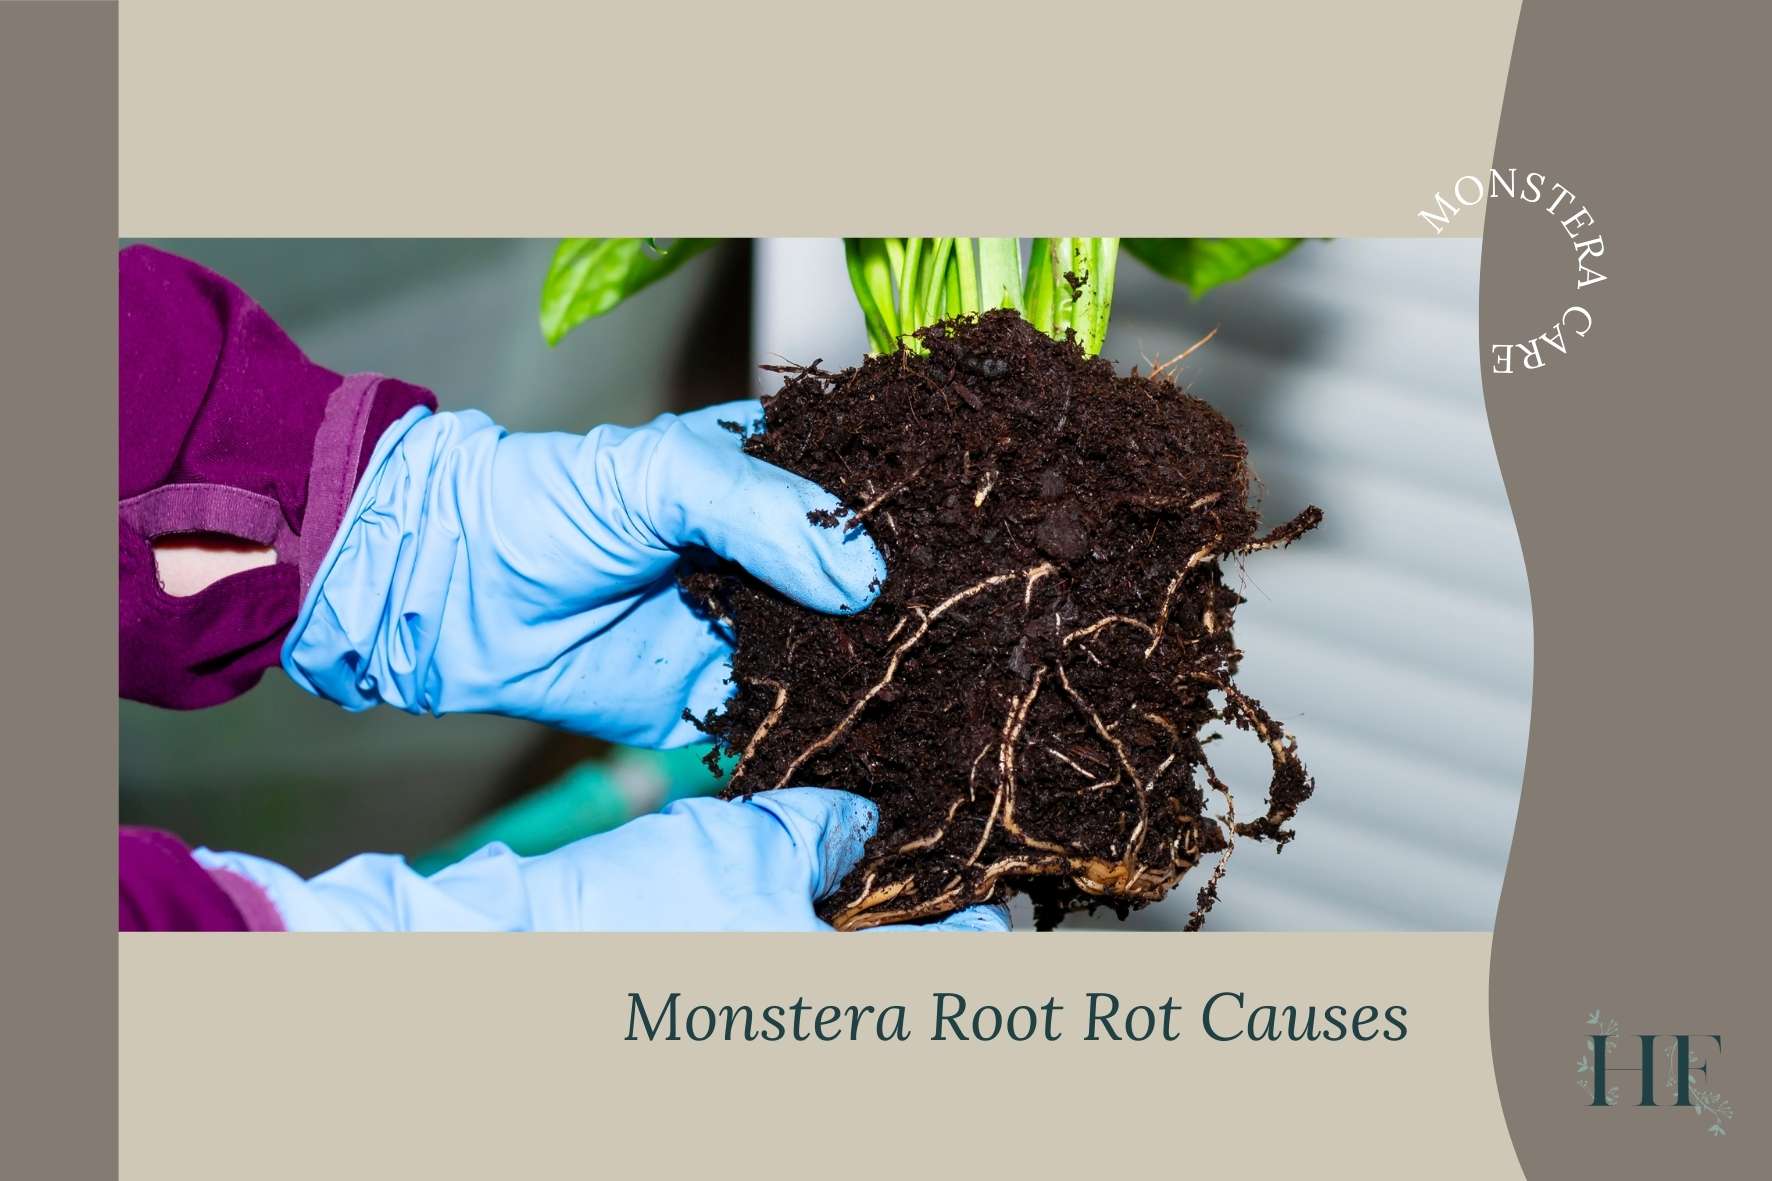
Monstera Root Rot Causes
What causes root rot in a monstera plant?
1) Overwatering
Overwatering is one of the biggest causes of root rot in a Monstera. This is when the soil is not able to dry out enough in between waterings.
When there is too much water in the soil, your Monstera’s root system becomes oversaturated and waterlogged, which can suffocate the roots and lead to root rot.
The most common reasons are poor drainage (no drainage holes or blocked ones, for instance) and watering too frequently (when the soil is already wet).
Other causes of overwatering include a pot that is too big, heavy compact soil, low temperature (the lower the temperature, the longer the soil needs to dry out) and not enough sunlight.
To avoid overwatering, check A Guide to Monstera Water Needs (How Often and When).
2) Fungal Infection
Root rot can be caused by a fungal infection. The soggy soil will create anaerobic conditions (low in oxygen and high in water) in soil that permits disease and bacteria to thrive, which will result in rotten, mushy roots.
There are two main types of soil fungi that can lead to Monstera root rot: fusarium and pythium.
Fusarium is a common soil fungus that thrives on dead or dying plant tissues.
Phytophthora root rot is the most common cause of root and stem base decay. This bacterial organism is commonly transmitted by fungus gnats (which also thrive in consistently moist soil conditions).
Did you know? Spores from these fungi travel through the air and are carried by insects (like fungus gnats). If one of your houseplants has fungal root rot, the fungus has likely travelled to other plants in your home. However, it will not grow or cause damage unless the soil becomes waterlogged.
Read also: 11 Monstera Pests and Diseases Plus How to Get Rid of Them.
Don’t worry though, as luckily there are treatments for Monstera root rot, as well as ways to prevent it from happening again once you notice the signs of root rot.
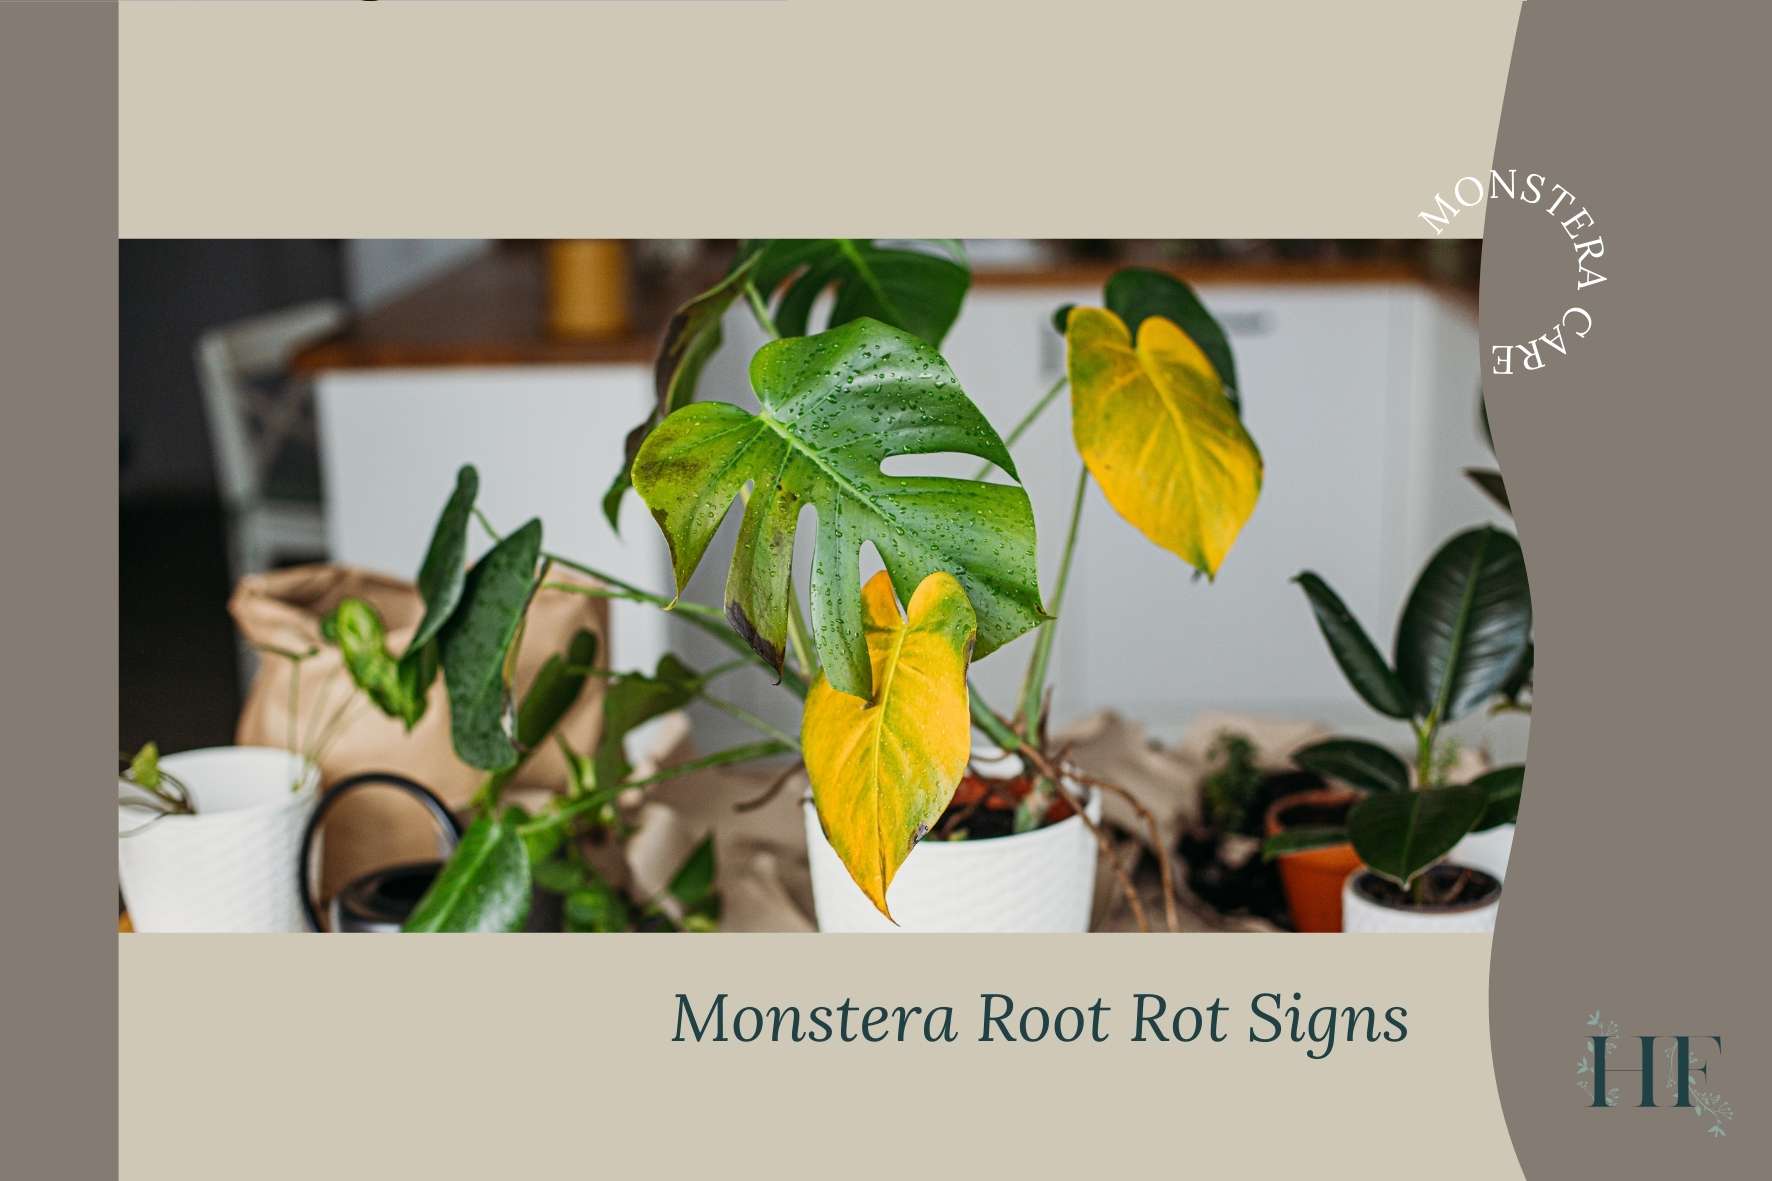
Monstera Root Rot Signs
As your Monstera’s roots are under the soil, it is hard to notice root rot unless you pay attention to the signs your Monstera gives that indicate that something is off.
Here are some of the Monstera root rot signs according to the stage of decay:
| STAGES OF ROOT ROT | SIGNS OF MONSTERA ROOT ROT |
|---|---|
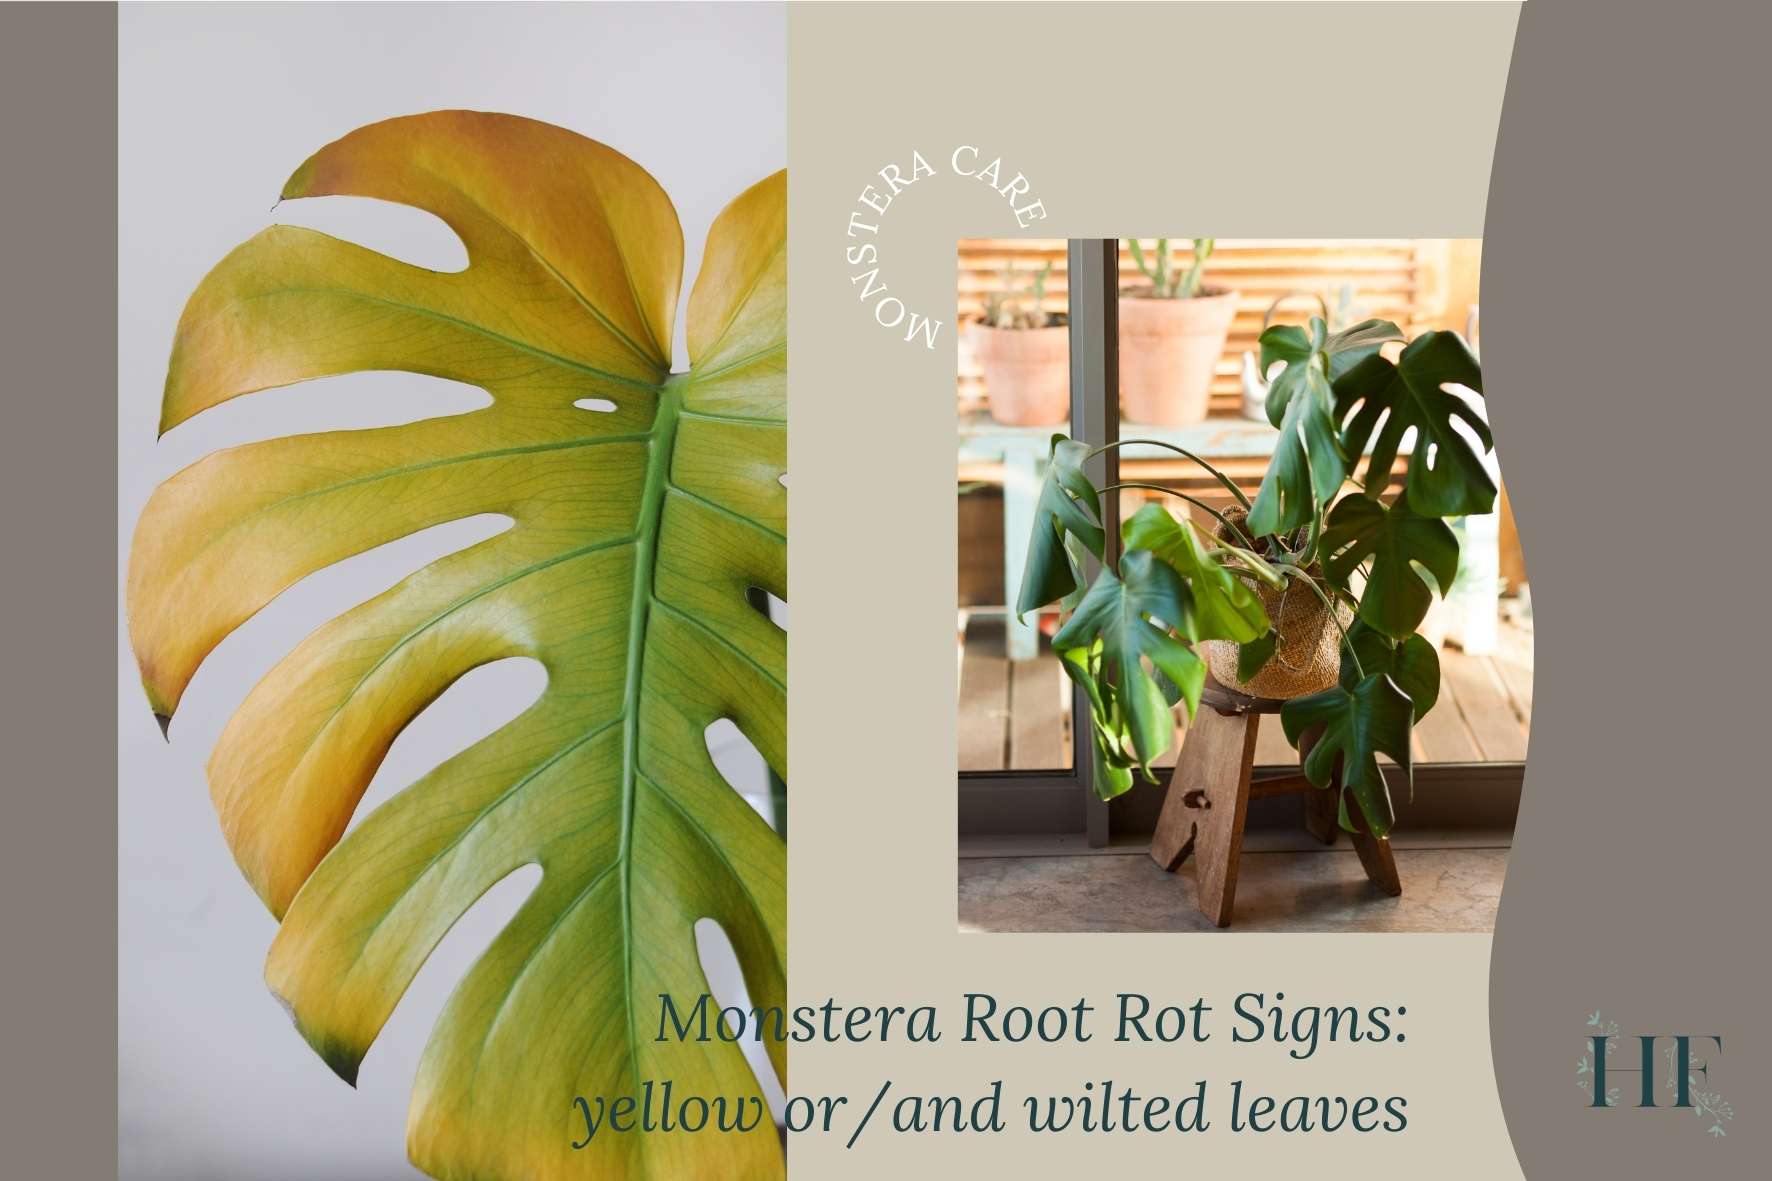
| Early detection | • Stagnant growth. • Wilted leaves. • Yellow leaves. |
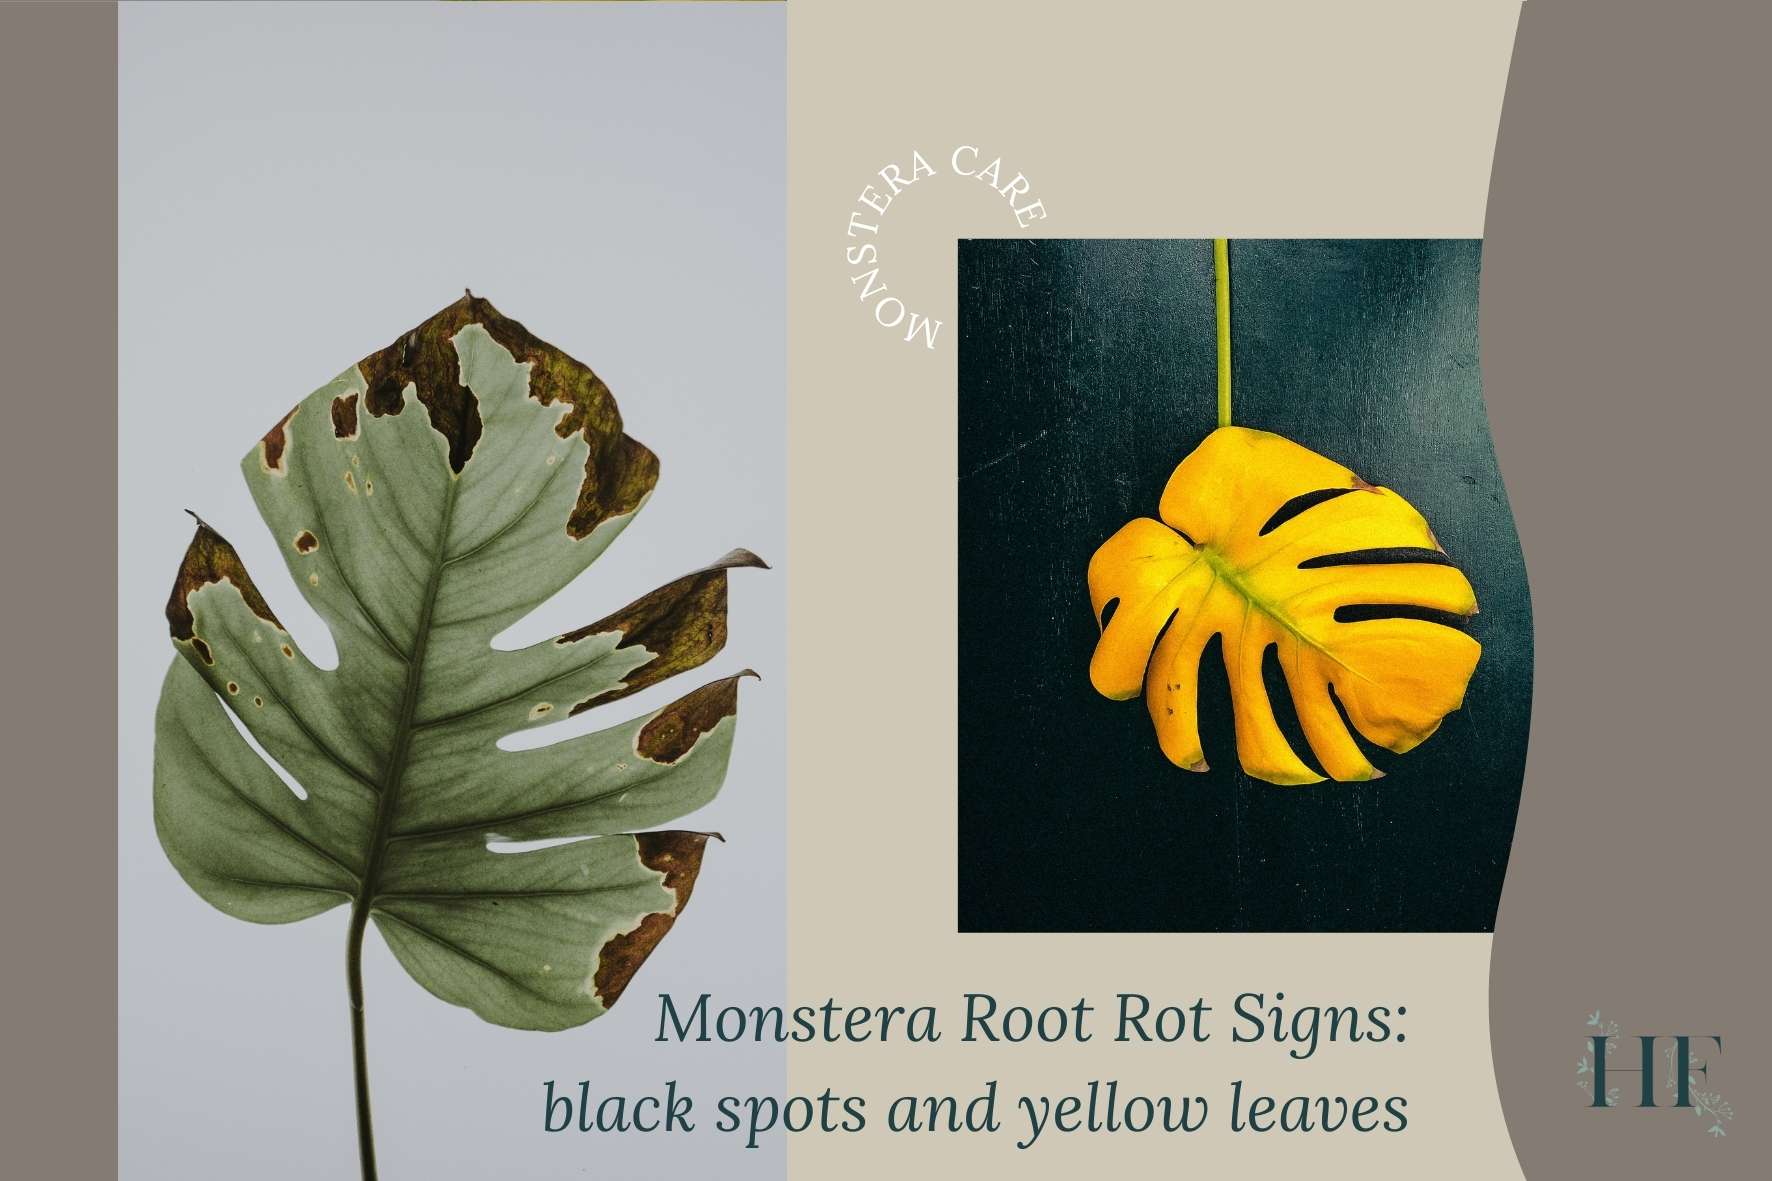
| Advanced root rot | • Brown or black spots on leaves. • Brown or black roots, with a mushy and slimy texture. • Foul odour roots. |
| Beyond saving | • Roots are dead. • Dark and mushy stems. |
It is crucial to know the signs of root rot in Monstera to catch the problem early enough to be able to treat it. The earlier you notice root rot in your Monstera, the more likely it is to survive!
Here are the signs that your Monstera is suffering from root rot, organized by severity and decay:
Early Detection
Early signs of root rot in Monstera are stagnant growth, wilted leaves, and yellow leaves.
1) Stagnant Growth
Stagnant growth means that your Monstera isn’t growing as fast as it usually does. Although this is expected during the dormant season (autumn and winter months), Monsteras can also slow their growth when they don’t get enough light, fertiliser, or water.
So, determining the cause is key to adjusting how you care for your plant.
Just because your Monstera is slowing down its growth doesn’t mean it has root rot, but it does indicate that it could happen if you don’t reduce your watering.
If your Monstera is growing slowly or it’s not growing at all, it won’t need as much water. Overwatering during stagnant growth can lead to root rot.
2) Wilted Leaves
Usually, wilted leaves indicate that your Monstera isn’t getting enough water from the soil. If your Monstera is wilting, check its soil to see if it is wet or dry. You can use a soil meter to be sure.
If the soil is dry, your Monstera is thirsty and you just need to water it.
If the soil is wet and your Monstera is droopy, your plant’s roots are probably damaged from rot and unable to take up the water that is already there. At this point, you should check your Monstera’s roots and look for rot.
3) Yellow Leaves
This is one of those issues that can have many different causes (such as nutrient deficiency). But both overwatering and underwatering can cause your Monstera’s leaves to turn yellow.
When overwatered, apart from wet soil, you will notice the older leaves or the leaves toward the bottom of the plant, yellowing first.
If you spot both yellowing and wilting leaves, plus wet soil, you should definitely check the roots for any sign of decay.
Advanced Root Rot
If the early warning signs are ignored or go unnoticed, your Monstera’s health will continue to decline.
The signs of advanced root rot are brown or black spots on leaves, foul odour coming from the soil and roots, and brown or black roots.
These signs mean your Monstera needs immediate treatment.
4) Brown or Black Spots on Leaves
Like yellow leaves, brown spots can have all kinds of causes, including root rot (which is caused by overwatering and fungal infection) and excessive dryness (a.k.a. underwatering).
Other possible causes are fertiliser burn due to overfertilization, lack of humidity, and bacterial infection.
If you see brown spots forming on your Monstera’s leaves, the first thing you can do is check the moisture levels of the soil.
If your Monstera is overwatered, the soil will be wet and you will find soft, dark brown spots on the lower leaves. These brown or black spots can also be accompanied by yellowing around the actual spot.
This is an indication that the infection has started to spread throughout the plant. If that is the case, you will need to act right away so you can save your plant!
Root rot will eventually spread through the entire plant, up the roots to the stem and to the leaves (the last stage of decay).
5) Roots Turn Brown or Black
Healthy Monstera roots are white or creamy looking.
When root rot sets in, the decaying roots turn brown or black, and they have a mushy and slimy texture.
You won’t be able to see this unless you dig into the soil or take your Monstera out of its pot to inspect the roots.
When treating your Monstera’s root rot, you will be trimming all dark roots to stop the infection from spreading.
6) Foul Odour Coming from the Roots
When the soil and roots have a foul odour, like something is rotten, your Monstera has root rot.
The stronger the smell, the larger the infection and the harder it will be to keep your Monstera alive at this point.
Beyond Saving
Unfortunately, sometimes all signs can be missed until it is too late.
Once fungi kills all the roots and the rot moves up the stems, your Monstera is beyond saving. The clear signs of the last stage of Monstera root rot are dead roots and dark mushy stems.
At this point, the only way to salvage your Monstera would be to try to propagate healthy sections of a stem, if there are any left.
7) Roots Are Dead
Your Monstera is unlikely to survive once all its roots are dead. No roots mean your Monstera can’t take in any water or nutrients from the soil, and it will likely die of dehydration.
8) Dark and Mushy Stem
Once rot travels up your Monstera’s stems, they will become dark and mushy like the roots. A rotten stem is unable to transport water and nutrients to the leaves, and as a result, your Monstera will soon die.
Monstera Root Rot Recovery
While there are multiple potential sources of root rot, the treatment is the same regardless of the root cause.
Now that you know that your Monstera has root rot, it’s time to treat it so it can keep living a healthy life. 🙂
How to Fix Monstera Root Rot
What you will need for Monstera root rot treatment:
- A clean pot: You can either disinfect the current one using white vinegar and dish soap or get a new one. If you need help choosing the right size and material, check How to Choose the Best Pot for Monsteras & 10 Planter Ideas.
- New potting mix: Since you cannot reuse the soil given it’s infected, you will need to prepare a new potting mixture. Check Which Type of Soil Is Best for Monstera? for a Monstera potting mix recipe that will suit your Monstera’s living conditions.
- Sharp gardening scissors or pruning shears: I recommend these shears since they ensure that you will make a clean cut, instead of crushing or bruising the stem. Also, they do well with larger, mature stems. Regardless if you use shears, scissors or a gardening knife, your tool needs to be sharp (to avoid damaging the plant) and clean (to avoid transferring any disease or fungus). You can clean them using dish soap, white vinegar or rubbing alcohol.
- Gardening gloves: Since all parts of the Monstera are toxic due to their needle-like insoluble calcium oxalates, you will want to use gloves to prevent skin irritation. Avoid touching your face when handling Monsteras. But if do get some sap on your skin, wash it with soap and warm water.
- White vinegar and dish soap: To disinfect your tools and pots. I use this gentle dish soap for both my plant care and for cleaning my home. White vinegar is also great to kill bacteria without being abrasive. I like to combine the two in a spray bottle when cleaning. Alternatively, you can use bleach or rubbing alcohol (personally, I find them too harsh).
- Hydrogen peroxide (or a natural fungicide): Hydrogen peroxide is a fungicide used to treat root rot. There are other natural alternatives that you can use. Continue reading for a full list and how to apply them.
Here’s how to fix Monstera root rot:
1) Inspect for Root Rot
First of all, you want to check on your Monstera roots and see how much damage there is.
Even if the signs are mild, you probably want to take a good look at the roots for peace of mind so the problem doesn’t escalate. However, you might get away with digging away a portion of the soil to look at the roots when you catch those early signs. It’s a personal choice how thorough you want to be.
To inspect your Monstera for root rot, take your plant out of its pot and look out for the following signs:
- Brown or black slimy roots that break easily.
- Waterlogged soil.
- Foul-smelling roots and soil.
- Mushy roots and stem.
Unfortunately, taking your Monstera out of its container tends to stress the plant out, causing it to droop its leaves for a little while. However, it’s a necessary step to assess the damage and treat root rot effectively.
If you see any of those signs, proceed to the next step.
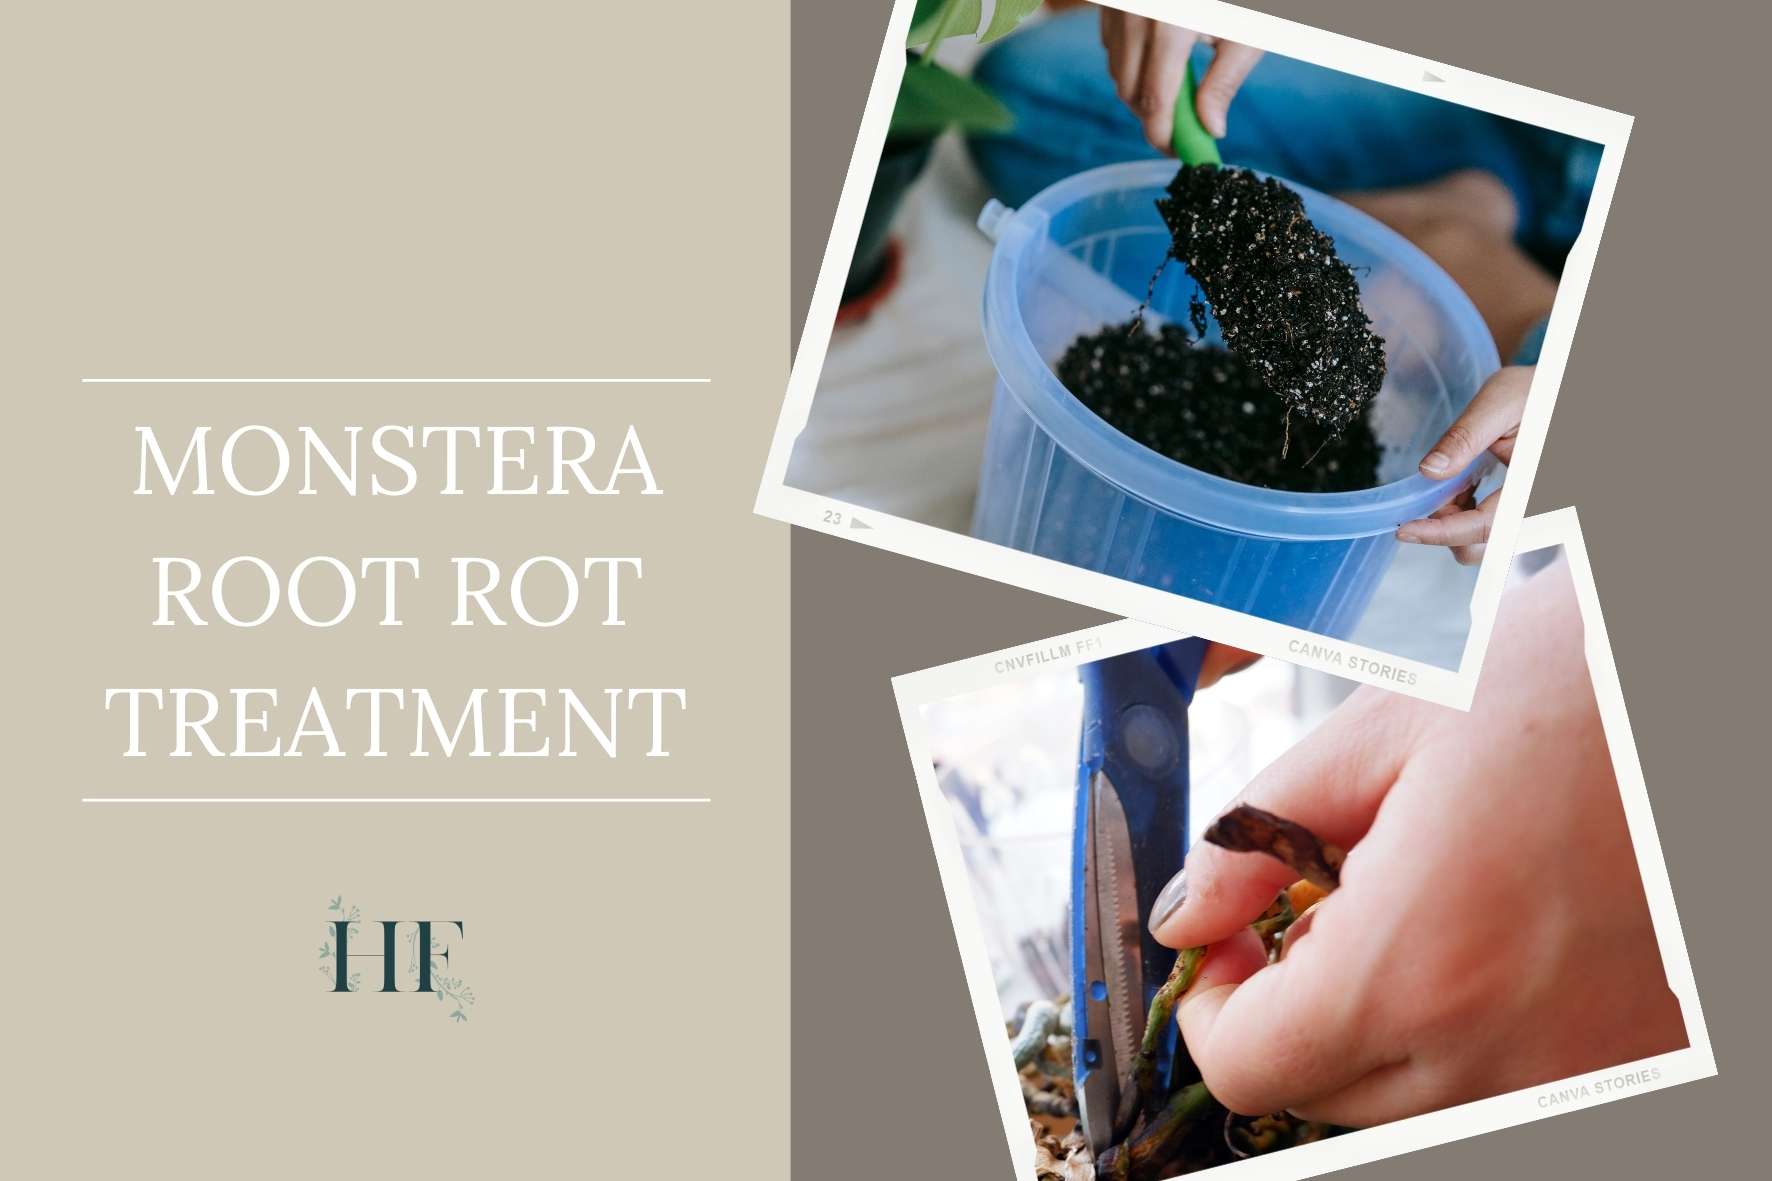
2) Rinse the Roots
Since root rot is a disease that lives in both the roots and the soil, you need to get rid of all the infected soil and wash those roots.
Brush away as much soil as you can with your hands (using gloves). If the stage of root rot is advanced, some roots will come off easily with the soil.
Discard all the infected soil by disposing it accordingly. Root rot causing fungi can live in the soil for years, and all it takes is a few days of too much water for it to start attacking your Monstera’s roots again. That’s why you won’t be able to reuse the soil and you cannot compost it either since the fungi will live on and spread.
Once you get rid of the soil, you will clearly see how many roots are affected.
Now, it’s time to wash those roots with water. Rinse all roots thoroughly under a strong stream of water.
A small Monstera will usually fit in the kitchen sink, but for a larger plant you will need to spray it using a hose outside.
3) Trim the Damaged Roots
After rinsing the roots, you need to trim off any dead or damaged roots. This is to prevent the fungal infection from spreading to the healthy roots.
Use white vinegar or rubbing alcohol to disinfect your shears in between every single cut.
Afterwards, dispose of all damaged plant material to avoid the bacteria from spreading.
If, by the time you finish pruning the damaged parts, there are no more roots or the rot extended into the stem, skip to Step 8.
4) Dry and Disinfect the Roots and Pot
Disinfect the roots with a fungicide to kill any remaining bacteria.
You can also use a diluted solution of hydrogen peroxide or a natural fungicide. Refer to Natural Fungicide for Monstera Root Rot Treatment section below for instructions on how to apply each remedy.
Then, let the roots air-dry under bright indirect sunlight to prevent re-infection (this can take a couple of hours).
Also, don’t forget to disinfect the pot using white vinegar and dish soap mix.
5) Repot Your Monstera in Fresh Soil
Prepare the new potting mix and repot your Monstera.
You can either use your old pot (by sterilizing it with vinegar first) or place your Monstera in a brand-new pot. Make sure your pot has plenty of drainage holes.
Also, you can use this occasion to adjust your potting soil to have better drainage by adding more perlite. This will prevent the soil from getting too compact and retaining too much moisture, preventing your plant from developing root rot again.
Read also: A Guide to Repotting Monstera (When, Why and How).
6) Prune Affected Leaves Too
Get rid of any damaged leaves by pruning yellow and spotted leaves. Cutting back leaves affected by root rot will allow your Monstera to bounce back faster.
It is a good practice to cut back up to a third of your Monstera’s leaves when you cut back its roots. With fewer roots, your plant won’t be able to support as many leaves, and they will droop.
7) Place Your Monstera under Bright Indirect Sunlight
Ideally, you will place your Monstera back in its spot, where it receives bright indirect sunlight for at least 6 hours a day.
Monsteras thrive in bright, indirect light. When they don’t get enough light, they don’t take up as much water and are susceptible to developing root rot.
Not only will this bright light keep your Monstera from developing rot, but it will also help it grow bigger and taller.
8) Propagate from a Healthy Cutting (Only In Severe Root Rot Cases)
If your Monstera ends up with no healthy roots left, you won’t be able to repot your plant. In this situation, the only way to salvage your Monstera is to propagate your plant from a healthy cutting.
Find at least one healthy stem that includes a node so you can propagate taking a cutting. At this point, you can propagate the Monstera cutting in soil or water.
Propagation is also the only way to fix Monstera root rot without repotting.
Read also: A Guide to Monstera Propagation in Soil, Water and more!
Natural Fungicide for Monstera Root Rot Treatment
If you are looking for a natural Monstera root rot fix, you can use the following fungicides:
1) Cinnamon
Cinnamon is a natural fungicide and rooting agent.
Apply cinnamon when treating your Monstera for root rot by dusting it on the freshly washed and trimmed roots.
It will help prevent rot from affecting the healthy tissue, plus it will stimulate new root growth.
2) Baking Soda
Baking soda, or sodium bicarbonate, is another natural fungicide that can be used to treat root rot.
When using baking soda as a fungicide, mix three tablespoons into a gallon (4.5 litres) of lukewarm water. Then, spray it into your Monstera’s soil and stems in the evening to help prevent a fungal root rot infection.
Use this remedy sparingly since baking soda is a salt, and too much salt is not good for your Monstera.
3) Apple Cider Vinegar
You can also use apple cider vinegar to combat root rot in your Monstera too.
When using apple cider vinegar as a fungicide, mix 3 tablespoons of apple cider vinegar into a gallon (4.5 litres) of lukewarm water and spray it onto your Monstera’s leaves, stem, and soil.
You can use the same apple cider vinegar that you use to dress your salads! 😉
4) Neem Oil
Neem oil is often used to treat pest and fungal infections in plants.
To use neem oil as a fungicide, mix a teaspoon of neem oil with a quarter of a gallon (1 litre) of water. Then add a couple of drops of dish soap to emulsify the mixture, and mix well.
Apply this mixture to your Monstera’s soil after watering.
I recommend this neem oil and this gentle dish soap (you probably don’t want to use anything harsh that can further damage your plant!)
5) Hydrogen Peroxide *
Hydrogen peroxide is a bleach and disinfectant that, when diluted, can be used to treat root rot.
This is the only non-natural fungicide on the list, but since it’s used quite often, I thought it will be useful to explain how to apply it.
To use hydrogen peroxide to treat root rot in Monstera, mix one tablespoon of 3% strength peroxide and one cup of water. I recommend this hydrogen peroxide.
You can dip the remaining roots into a diluted hydrogen peroxide solution or spray the roots with the solution.
| FUNGICIDE | HOW TO APPLY IT |
|---|---|
| Cinnamon | Sprinkle cinnamon powder on roots. |
| Baking Soda | 1) Mix three tablespoons of baking soda into a gallon (4.5 litres) of lukewarm water. 2) Spray the mixture into your Monstera’s soil and stems. |
| Apple Cider Vinegar | 1) Mix three tablespoons of apple cider vinegar into a gallon (4.5 litres) of lukewarm water. 2) Spray the mixture into your Monstera’s leaves, stem, and soil. |
| Neem Oil | 1) Mix a teaspoon of neem oil with a quarter of a gallon (1 litre) of water. 2) Add a couple of drops of dish soap to emulsify the mixture, and mix well. 3) Apply this mixture to your Monstera’s soil after watering. |
| Hydrogen Peroxide | 1) Mix one tablespoon of 3% strength peroxide and one cup of water. 2) Dip the roots into the diluted solution or spray the roots with it. |
How to Prevent Monstera Root Rot
Ultimately, the best way to keep your Monstera from dying from root rot is to prevent it from happening in the first place. Thankfully, this is easy enough to do with a little bit of extra care.
Here are the steps that you can take to prevent root rot in your Monstera plant:
1) Have Proper Drainage
Make sure your Monstera’s pot has drainage holes, so the roots have room to breathe and the excess water can make its way out of the pot.
A pot without drainage holes is a big no-no.
You can either drill holes into your pot or buy one that already has plenty of drainage holes.
Since most of the prettiest pots do not have drainage holes, you can place a plastic pot inside a decorative one. This is a win-win situation.
Check How to Choose the Best Pot for Monsteras & 10 Planter Ideas for some inspiration!
2) Aerate the Soil
In addition to proper drainage, your Monstera’s soil needs aeration. Adding orchid bark chip and/or perlite into the potting mix will help with soil aeration.
Both orchid bark chips. and perlite are great for soil aeration and drainage since they prevent the soil from compacting, allowing most water to drain through.
These ingredients are key to avoid the soil from getting waterlogged and to enable roots from absorbing oxygen.
Check Which Type of Soil Is Best for Monstera? for a Monstera potting mix recipe that will suit your Monstera’s living conditions and your watering habits!

3) Check Soil Before Watering
I cannot emphasize enough how important is to check the soil before watering your Monstera.
Even if your Monstera has adequate drainage and aeration, it can still get waterlogged if you water it too frequently.
How much and how often you water your plant will depend on many factors, including the climate and seasonality. That’s why is best to always check the moisture level of the soil before watering. It’s the only way to make sure that your Monstera does in fact need water.
Your watering schedule should only be a guideline, and you should always adjust it based on your Monstera’s actual needs.
You can use a soil meter (the most accurate method) to find the moisture levels of your Monstera’s roots. Simply insert the sensor into the soil halfway between the base of the plant and the edge of the pot and about halfway down into the pot.
The meter will let you know if the soil is dry (1-3), moist (4-7) or wet (8-10). You only need to water your Monstera when the soil is dry. This is the soil meter that I use and recommend.
Only water your Monstera when the topsoil has dried about 80% of the way, which means that the soil feels moist 1 to 2 inches below the surface when you stick your finger into the soil. Usually, this happens once a week or once every two weeks.
Read also: A Guide to Monstera Water Needs (How Often and When).
4) Inspect for Pest and Fungal Infections
Inspecting your Monstera regularly will help you catch any infection and pests before they become deadly.
Signs that something is wrong include drooping leaves, yellow and brown leaves, spots on leaves, honeydew (a sticky substance), etc.
Read also: 11 Monstera Pests and Diseases Plus How to Get Rid of Them.