At one point or another, many of us have asked ourselves… Why is my air plant dying?
Although there is no definitive answer to figure out why a particular air plant is dying (or actually died, sorry), I put together a list of common problems, pests and diseases that affect air plants.
Knowing what went wrong will help you to prevent future problems and improve care for your other plants.
Air Plant Problems
Dying air plants can be discouraging, especially when you are not sure why. Overwatering, underwatering, and rot are not the only issues with Tillandsias. There are at least 10 common problems that can be the cause of your air plant dying.
These common problems will help you identify what is wrong with your Tillandsia:
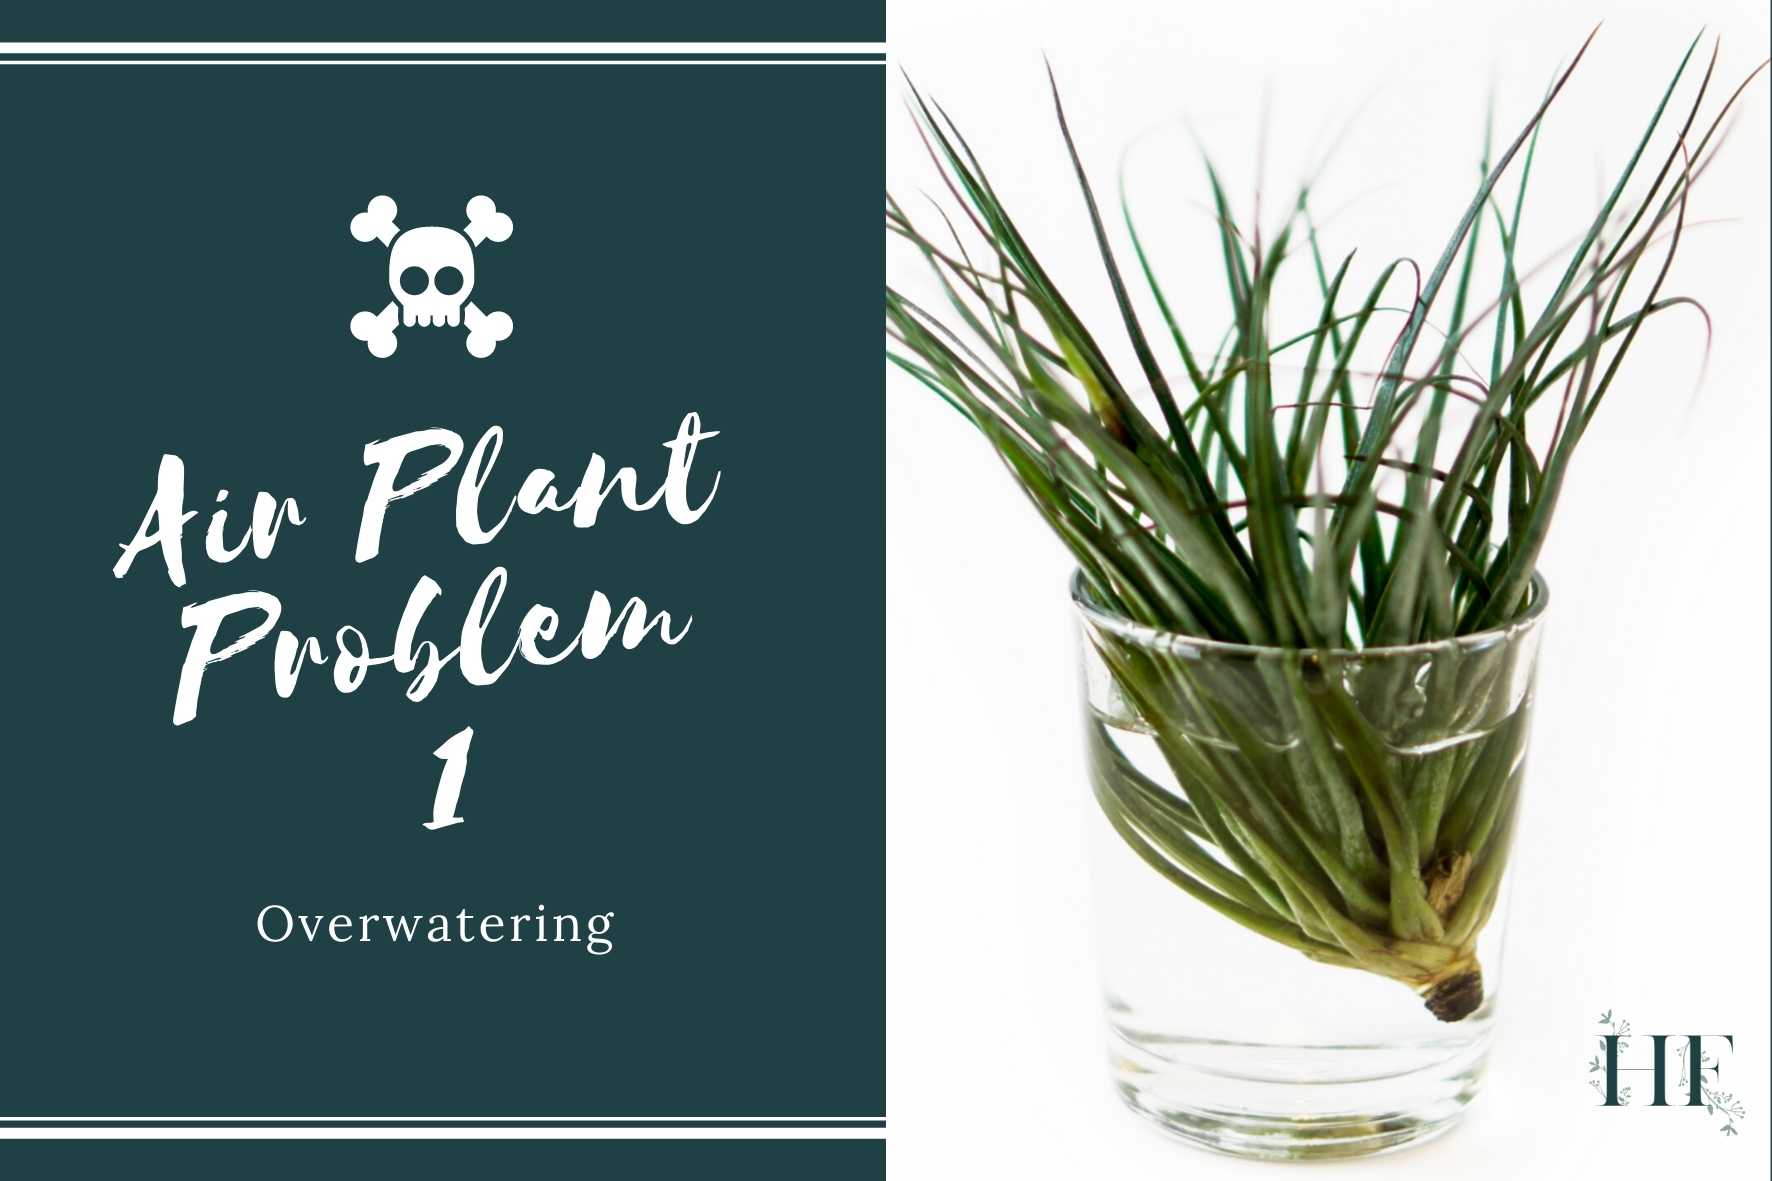
1) Overwatered Air Plant
Overwatering might not be easy to spot until it’s too late and the rot has set in (which I’ll talk about in point #2).
Signs of Overwatering in Air Plants
Here are the signs of overwatering (or/and rotting) in air plants to watch out for:
- Black or brown colouring at the base or centre of the plant.
- Black spots on the leaves.
- Leaves falling off from the centre.
Those signs are how you can tell if you overwatered your air plant.
Unfortunately, if your Tillandsia has been over-watered, it’s often too late to save it, especially if rot has set at its core.
However, the best thing you can do in an attempt to save your air plant is to remove the affected leaves from the base of the plant. This can stop the spread of the fungus/rot.
Preventing Overwatering in Air Plants (Watering Tips)
Here’s how to prevent overwatering!
Air plants need to be watered once a week by soaking them (fully submerged) in a bowl of water for 20 minutes to 1 hour. Misting air plants once a week is helpful but is not a substitute for soaking.
Also, the mesic type of air plants prefers moderate humidity and frequent watering. Xeric types, however, thrive in a drier climate with high humidity levels and require less watering.
As a general guideline, water your air plants once a week. If the air in your house is particularly dry, water your air plant more often (every five days). In a humid environment, water it every ten days.
Note the condition of the leaves the day after a good soak. The leaves should be open and be more flat rather than curled or folded. Aim for this look after each watering and increase or decrease the watering frequency accordingly.
When it comes to drying them, you can place them upside down on a towel and set them in a shaded, windy spot.
Read also: Air Plant Watering Guide – How to Water and Mist Tillandsias.
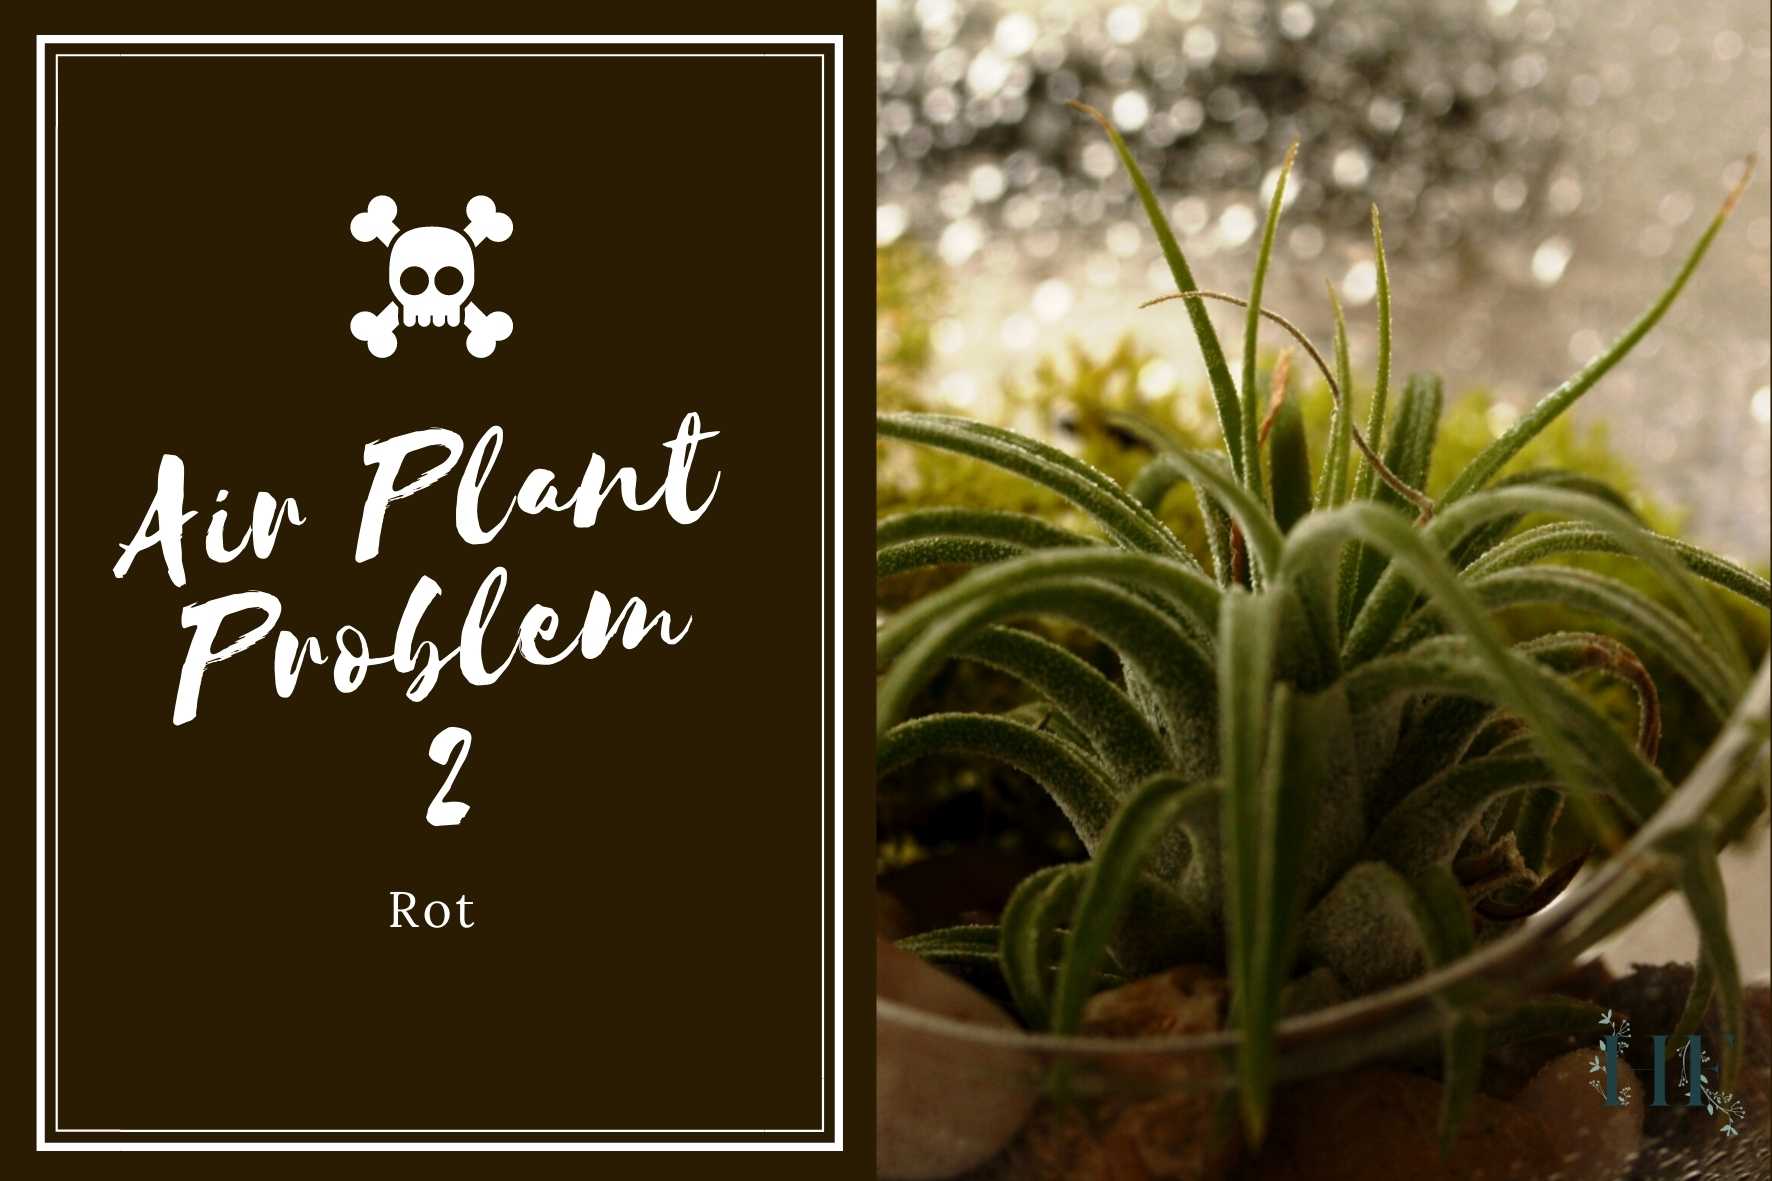
2) Air Plant Rot
The ultimate consequence of overwatering is rot.
Too much water can kill an air pant, (and any other houseplant for that matter). But air plants rot easily when they are not allowed to dry out completely after soaking them.
This occurs, for example, when you mist air plants inside a terrarium or another type of enclosed display. The tightness of the container traps moisture which can cause rot at the base of the plants.
Also, rot can happen if you don’t let them dry completely, and the water gathers at its core.
Inner rot is tough to diagnose as you generally are not aware until the air plant suddenly falls apart. Leaf rot, however, is more noticeable.
Signs of Rot in Air Plants
Here are the signs of rotting in air plants:
- Black, purple or brown colouring at the base or centre of the plant.
- Dark spots on the base of the plant.
- Feel soft and mushy at the base.
- The air plant suddenly falls apart.
The bad news is that rot is fatal.
Preventing Rot in Air Plants
The only way to prevent rot is to water it accordingly (refer to the Preventing Overwatering in Air Plants section above) and especially to allow your air plant to completely dry before putting it back in its display.
After soaking in water, set the air plant on its side or upside down for about 4 hours on a shaded area where air circulates to facilitate the process. This will allow the excess of water to trickle down from the centre of the plant, rather than gathering at its core.
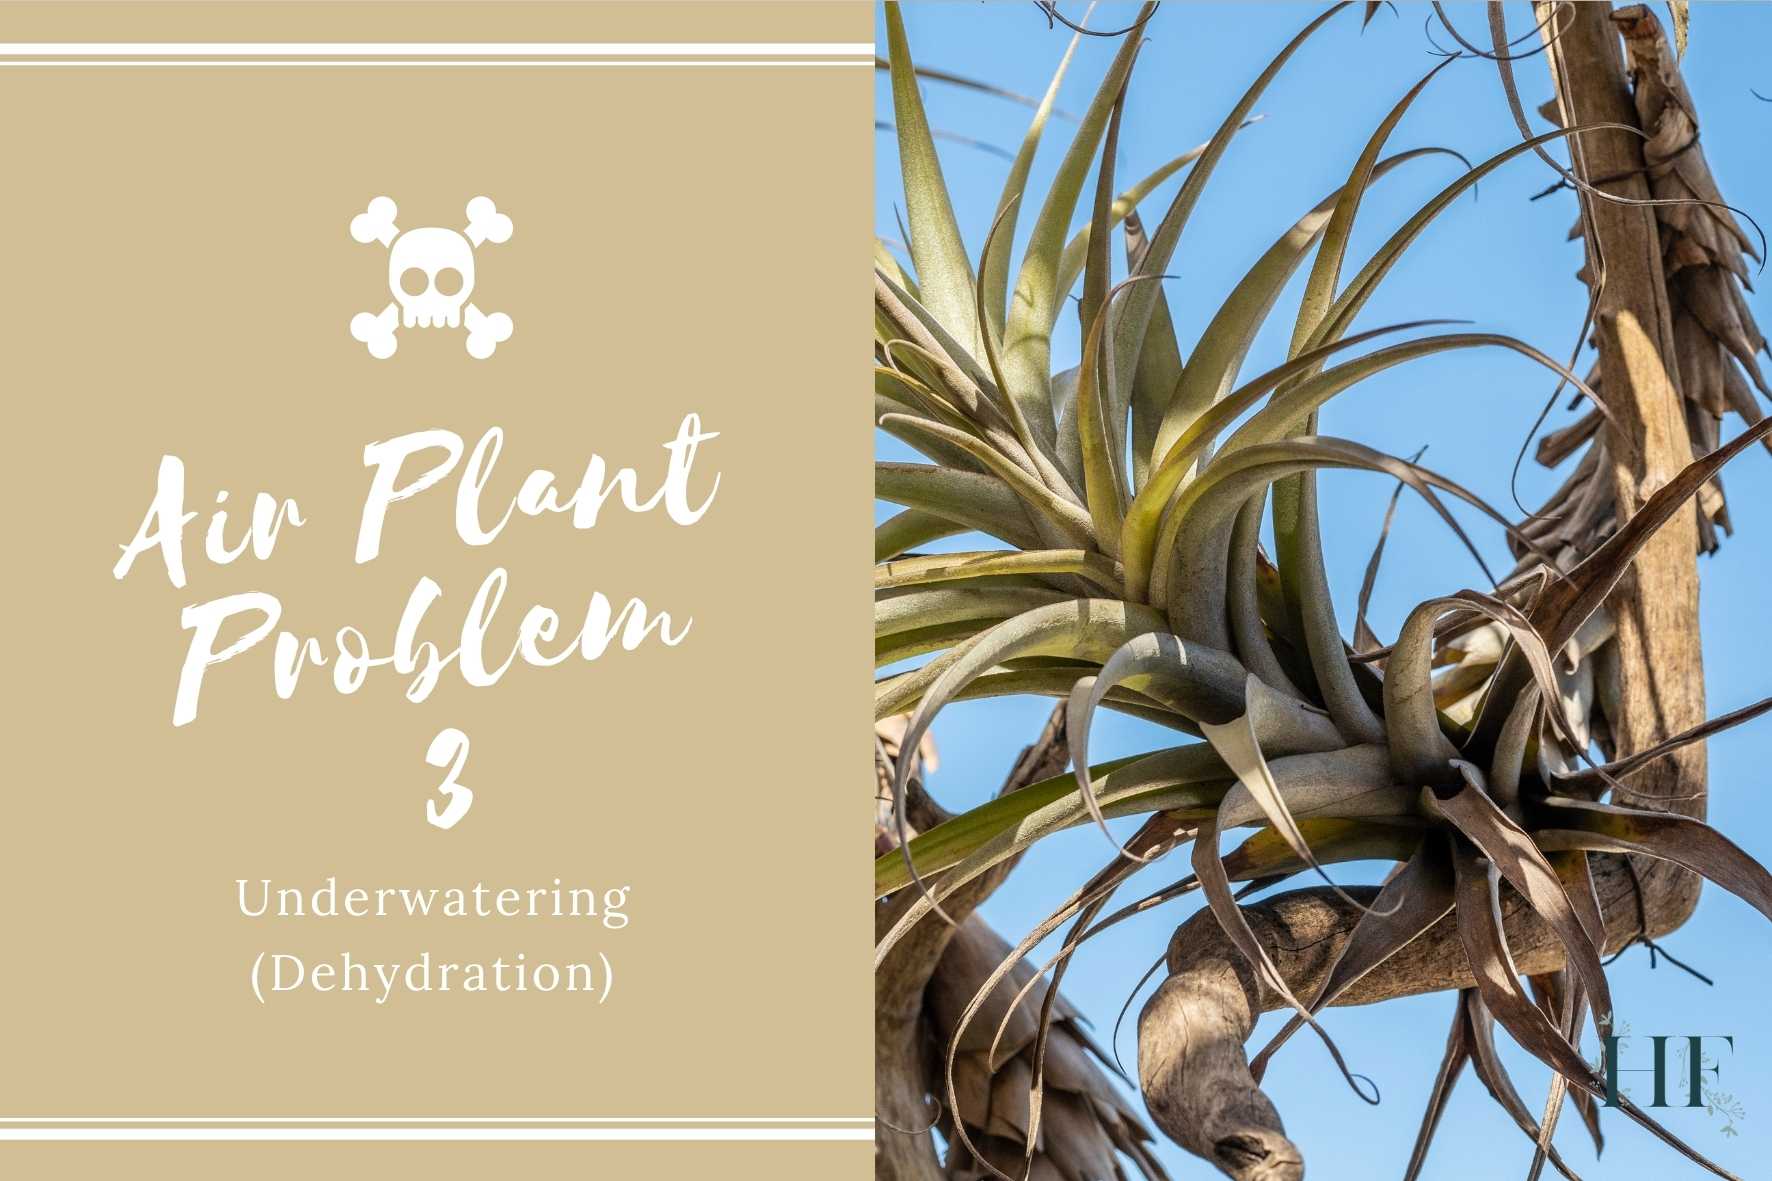
3) Underwatered or Dehydrated Air Plant
Are your air plant’s ends and leaves turning brown?
Your air plant is drying out. You have a dehydration problem.
Why is my air plant turning brown?
Because it needs water.
Underwatering is less common than overwatering. It doesn’t just happen because you forget to water your plants, or you are not watering them often enough (especially during summertime), although these two points do factor in.
Air plants dry out as a combination of infrequent watering, high temperatures and low relative humidity.
Signs of Underwatering in Air Plants
Signs of under-watering (or dehydration) in air plants include:
- Curling, wrinkling or rolling leaves.
- Leaf tips turning brown, dry or crispy.
- Leaves are lighter in colour.
These are signs that your air plant needs to be watered more frequently. Remember that the mesic type needs to be watered more frequently than the xeric type.
Preventing Dehydration in Air Plants
The best solution is to follow a watering schedule that suits your type of air plant. For that, consider the watering tips above on how to water air plants.
Read also: Air Plants Lifespan – How to Revive and Increase Life Expectancy, if you are planning on reviving your dehydrated air plant.
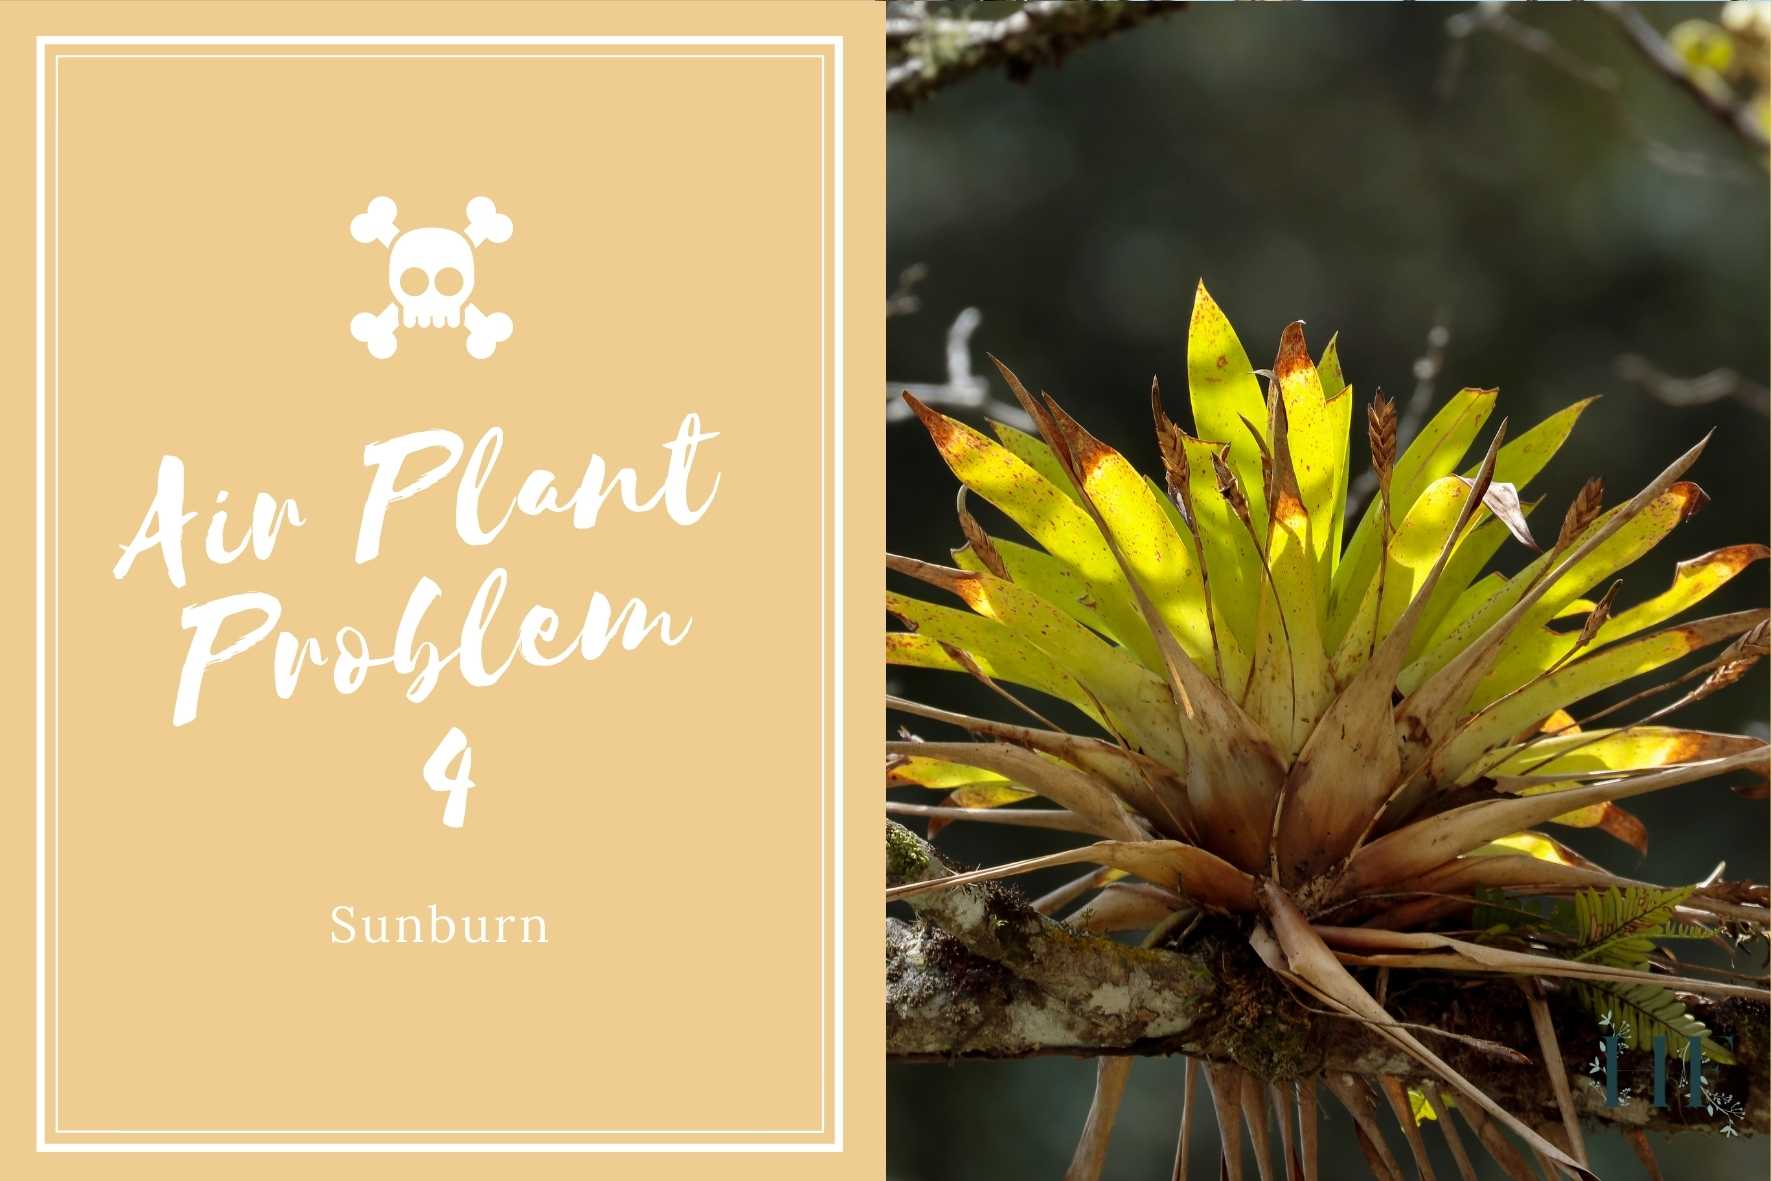
4) Air Plant Sunburn
Why is my air plant turning white? An air plant losing colour is a sign of sunburn, also referred to as bleaching.
If your air plant is exposed to too much sunlight, its moisture will get depleted. This can cause them to get sunburn and eventually die if they are left in the sun too long.
Sunburn is usually the result of an air plant overheating under glass in direct sunlight, and low relative humidity, causing the foliage to scorch. Glass acts as a magnifying glass that can concentrate the sunlight on the leaves, quickly causing them to burn.
This also can happen if you leave your air plant to dry in the sun. Its trichomes, which normally reflect light, won’t be able to do their job as well when wet. Burning can happen very quickly in this situation.
Sign of Sunburn in Air Plants
Signs of sunburn in air plants include:
- Bleached leaves or discolouration (loss of colour).
- Crispy brown leaves (or leaf tips).
- Scorched spots.
Preventing Sunburn in Air Plants
Tillandsias thrive in bright, filtered light. How much light an air plant needs depends on its type: a mesic (prefer indirect sunlight) or xeric type (prefer bright direct sunlight).
If you notice any sunburn signs, move the air plant to a less sunny location. But before that, you should:
- Trim or pull the damaged leaves.
- Give the air plant a good soaking.
- Do not fertilize the air plant until it is completely healthy again. Just continue with your watering schedule and add a few daily, light mistings.
Be patient and consistent and your air plant should get back to its happy, healthy self in no time!
Read also: Air Plant Light Guide – How Much Light Do They Need.
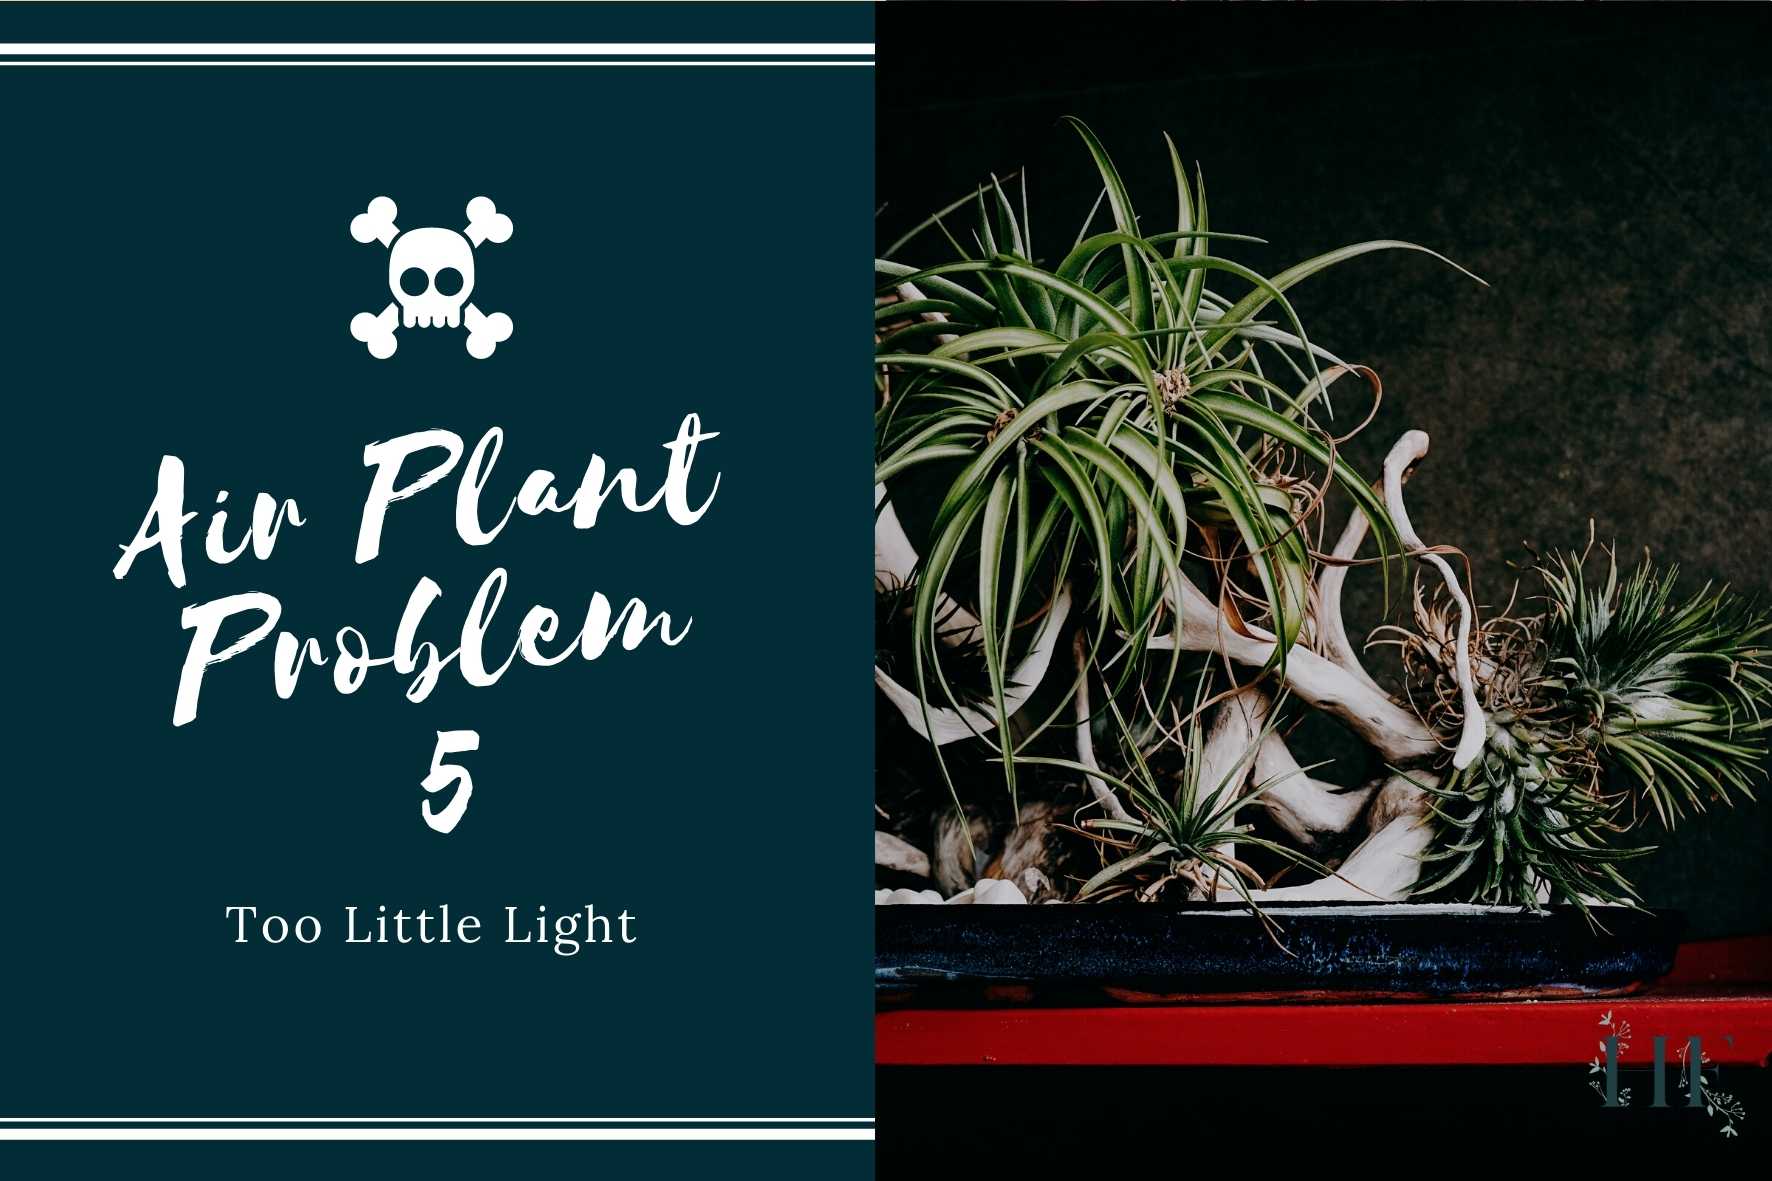
5) Too Little Light
Too much light can cause sunburn, but too little light can also be detrimental to your plant.
If your air plant turns much lighter in colour it’s telling you that it needs more daylight.
Air plants displayed in dark inner hallways or dim bathrooms will decline in health and eventually die.
Sign of Too Little Light in Air Plants
Signs of an air plant getting too little light include:
- Air plant losing colour.
- Looking dull and slowly withering away.
- Air plant not growing (especially during the summer months).
- Leaf loss.
Preventing Too Little Light in Air Plants
The easiest way to solve this problem is by providing more light.
Air plants need light to live and they thrive in bright, filtered light. The best practice is to keep your air plants where they will receive bright, indirect sunlight, about 3-5 feet from a window.
Insider Tip: Instead of suddenly moving your air plant to a glaringly bright spot, slowly increase its exposure to bright, filtered lighting to prevent shocking the plant.
If you don’t have enough natural light, you can consider artificial lighting. Air plants can grow in artificial light as well but it must be a full-spectrum fluorescent light. Aim for 12 hours of fluorescent light for air plants to grow, which mimics daylight hours.
Read also: Air Plant Light Guide – How Much Light Do They Need – which has a section on artificial lighting.
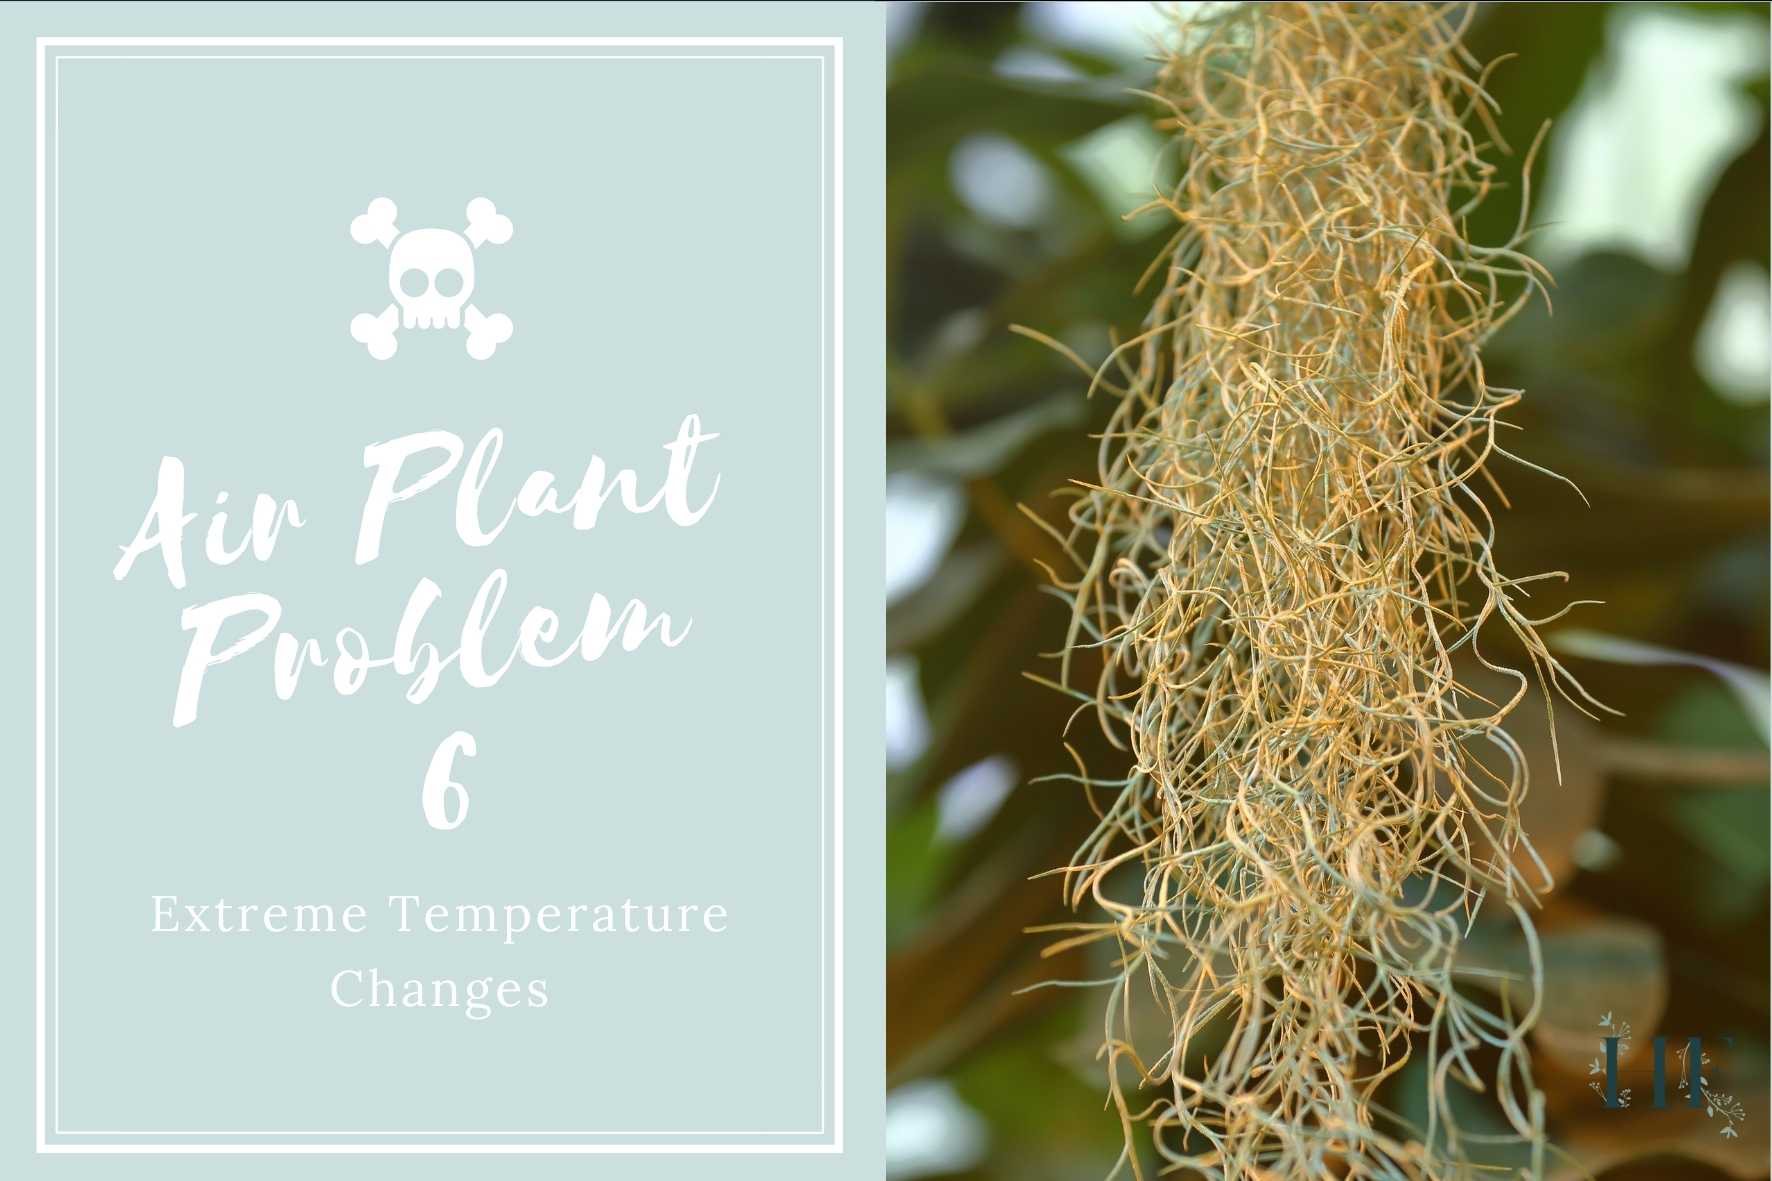
6) Extreme Temperature Changes
Once out of their natural habitat, it’s up to us to replicate the environment where they thrive.
Direct sunlight will dehydrate plants quicker (for instance, sitting next to a hot window), and it can lead to sunburn.
In contrast, too cold temperatures can lead to frost, which is lethal to most air plants (especially the ones that are commercially available, with the exception of Spanish Moss – Tillandsia usneoides). This especially applies if you keep them outdoors.
Signs of Extreme Temperature Changes for Air Plants
The signs will vary, depending on the environmental changes. Air plants can show signs of:
- Sunburn (too much direct sun, especially in the summer).
- Frost – limp and mushy (too low temperatures).
- Rot (overwatering on colder temperatures).
Preventing Extreme Temperature Changes for Air Plants
Keeping your air plants at a safe temperature range and avoiding suddenly moving them to a spot that’s significantly colder than where they were before is key.
Air plant temperature needs to be 12°C (54°F) at its lowest and 30°C (86°F) at its highest. Tillandsias thrive in warmer temperatures; they can’t survive in the winter frost (source).
In other words, air plants will be pretty happy inside the average home, temperature-wise. However, the average home probably lacks humidity. So, you should pay attention to their water needs.
Also, remember the xeric type of air plants is accustomed to hot temperatures in their natural environment. Xeric plants like Xerographica, Harisii, and Stricta come from drier or dessert-like habitats. They can withstand more direct sunlight than the mesic type.
Insider Tip: The warmer the temperatures, the more frequent the need for watering. And the opposite also applies – all plants need less water when it’s cold, as they won’t be actively growing, and getting too wet can cause rot.
Finally, if your air plants are outdoors only for the warm season, I recommend bringing them indoors when the nights start falling below 12°C (54°F).
Read also: Air Plant Environment – Light, Temperature, and Humidity Needs.
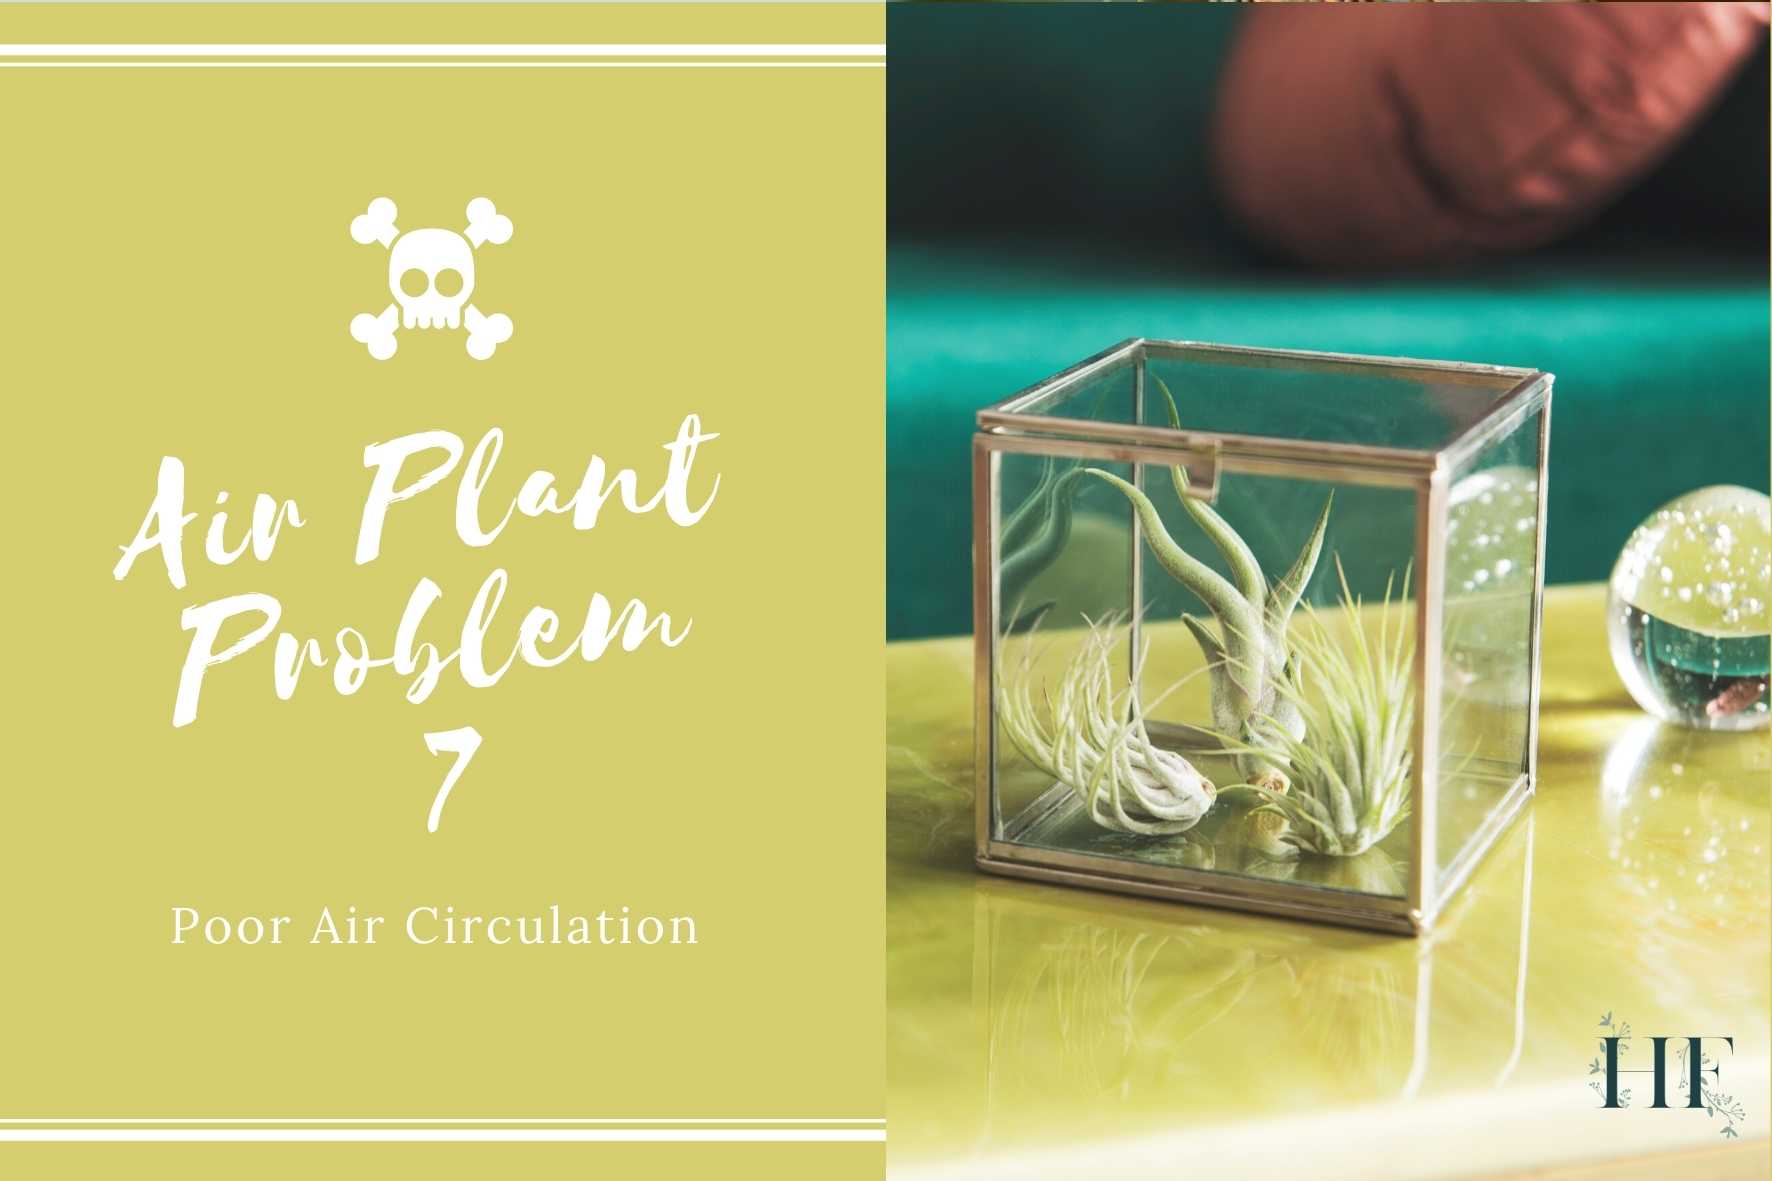
7) Poor Air Circulation
Displaying your air plants on a tight display that lacks proper air circulation (like terrariums) and not letting your air plant completely dry before returning it to its display are the main causes of this.
Signs of Poor Air Circulation for Air Plants
Poor air circulation looks similar to overwatering. The air plant ends turning brown and eventually dying due to excess moisture on its core.
Preventing Poor Air Circulation for Air Plants
Air plants need air circulation, not staleness. The airflow allows these plants to absorb nutrients, dry out after watering and remain healthy. If an air plant doesn’t absorb enough air, it will wither away and die.
Since Tillandsias evolved in sites that have high airflow, it’s important to provide a well-ventilated location and display. If the air is hot, some ventilation will cool down the plant and keep it from becoming overheated.
Enclosed display options like terrariums don’t provide enough air circulation, especially when the opening is small. Be aware that air plants kept under glass will not last as long as the ones in an open-air display.
Air plants thrive best in the open display (like mounted on wood or standing on a rock), so they get plenty of air around them.
Read also: 10 Air Plant Display Ideas that Won’t Harm Tillandsias.
Insider Tip: Tillandsia usneoides, also known as Spanish Moss, is a common victim of poor air circulation. This species grows so densely that it might choke out its own inner growth, so it’s best placed in a very well-ventilated spot or spread out a bit more. i.e., It will eventually die when placed flush against a wall or used as stuffing inside a terrarium globe.
Finally, avoid placing your air plants near heating and cooling vents or fans, they will certainly dry out your plants.
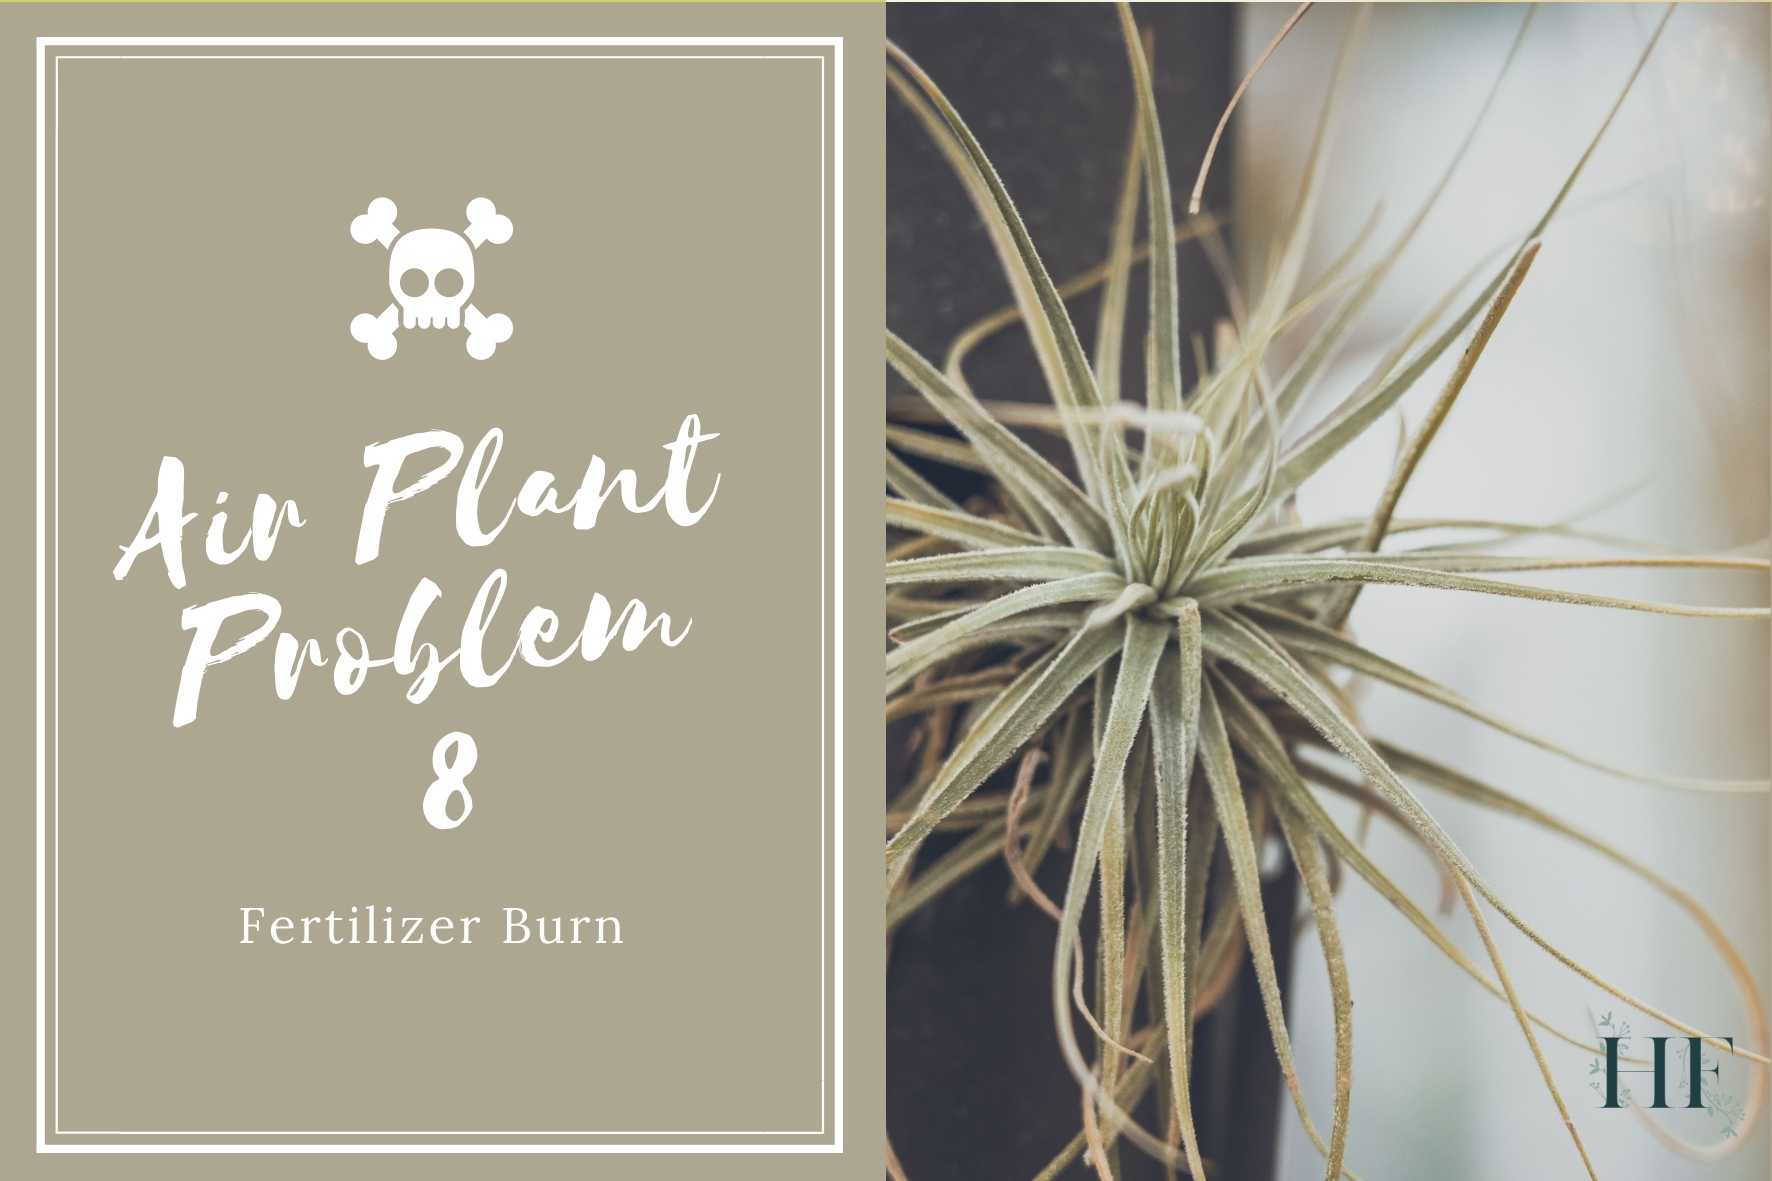
8) Fertilizer Burn
If you fertilize your air plants too often or use a non-appropriate fertilizer, the nitrogen in the fertilizer will burn on their leaves and will kill them.
Signs of Fertilizer Burn in Air Plants
The most common sign is when air plants look dry and crispy, with browning leaves, and yet you know they are hydrated.
Preventing Fertilizer Burn in Air Plants
It’s not necessary to fertilize air plants. However, as houseplants, they might need extra nutrients to thrive like they do in the wild. Fertilizers encourage air plant growth, bloom cycle, and offset (pup) production.
First of all, the best option is to go for a Bromeliad, Tillandsia or epiphyte specific fertilizer. Here’s an air plan specific fertilizer that you might want to consider.
Then, to fertilize your air plants safely, follow these steps:
- Apply fertilizer during the growing season and when blooming.
- Fertilize only once a month.
- Start by diluting to 1/4 of the strength recommended on the label into lukewarm water.
There are two methods to fertilize air plants:
- Soaking or dunking method.
- Misting or spraying method.
Read also: Air Plant Nutrients Guide – When to Fertilize Tillandsias.
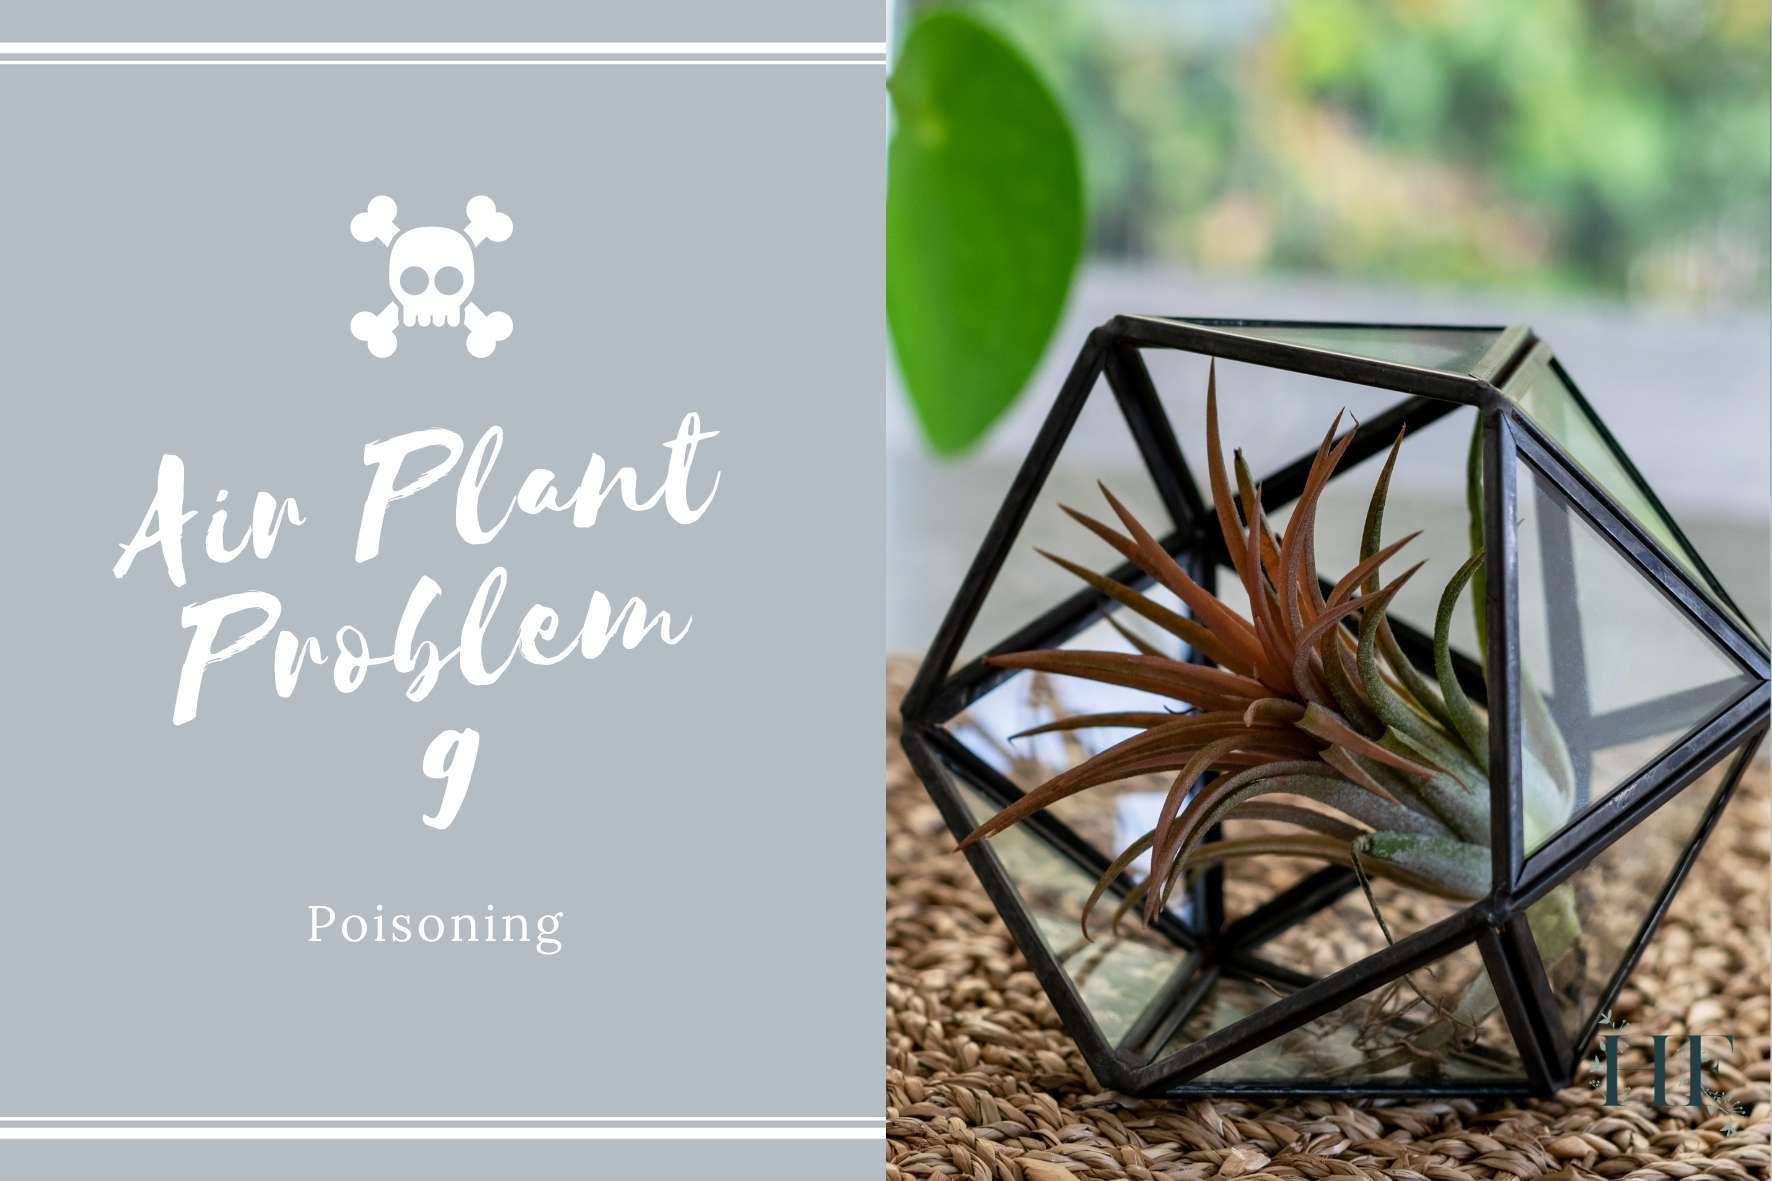
9) Air Plant Poisoning
Air plan poisoning happens when:
- Using a fertilizer that contains metals that are good for most other plants but are toxic to air plants (for instance, copper, boron, iron and zinc).
- Reacting to toxins such as copper, pressure-treated wood or rust due to its display (for example, using copper wires on a wood mounted air plant).
- Watering them using water with a high concentration of salt or/and chlorine.
Since air plants have no soil to filter the salts, these end up being deposited on the ends of the leaves. Over time, this will suffocate the plant as it prevents the trichomes from absorbing water and nutrients.
Signs of Air Plant Poisoning
It can start with an air plant getting brown leaf tips, and looking dry and crispy. The signs are similar to those of fertilizer burn.
Preventing Air Plant Poisoning
Use a display material safe for air plants (avoid copper or any metal that can rust) and use a fertilizer specifically formulated for bromeliads, tillandsias, or this air plan specific fertilizer.
What type of water should you use to water your air plants?
The best type of water to water air plants is rainwater since it’s richer in natural minerals and nutrients that are beneficial to air plants. Also, use lukewarm water because cold or hot water will shock the plant.
If you have a garden or space for it, you could collect rainwater in a tank. Otherwise, you can use:
- Springwater.
- Filtered water – beware of the levels of salt that can build up in the plant leaves.
- Tap water – allow it to sit at room temperature for 24 hours for the chlorine to dissipate.
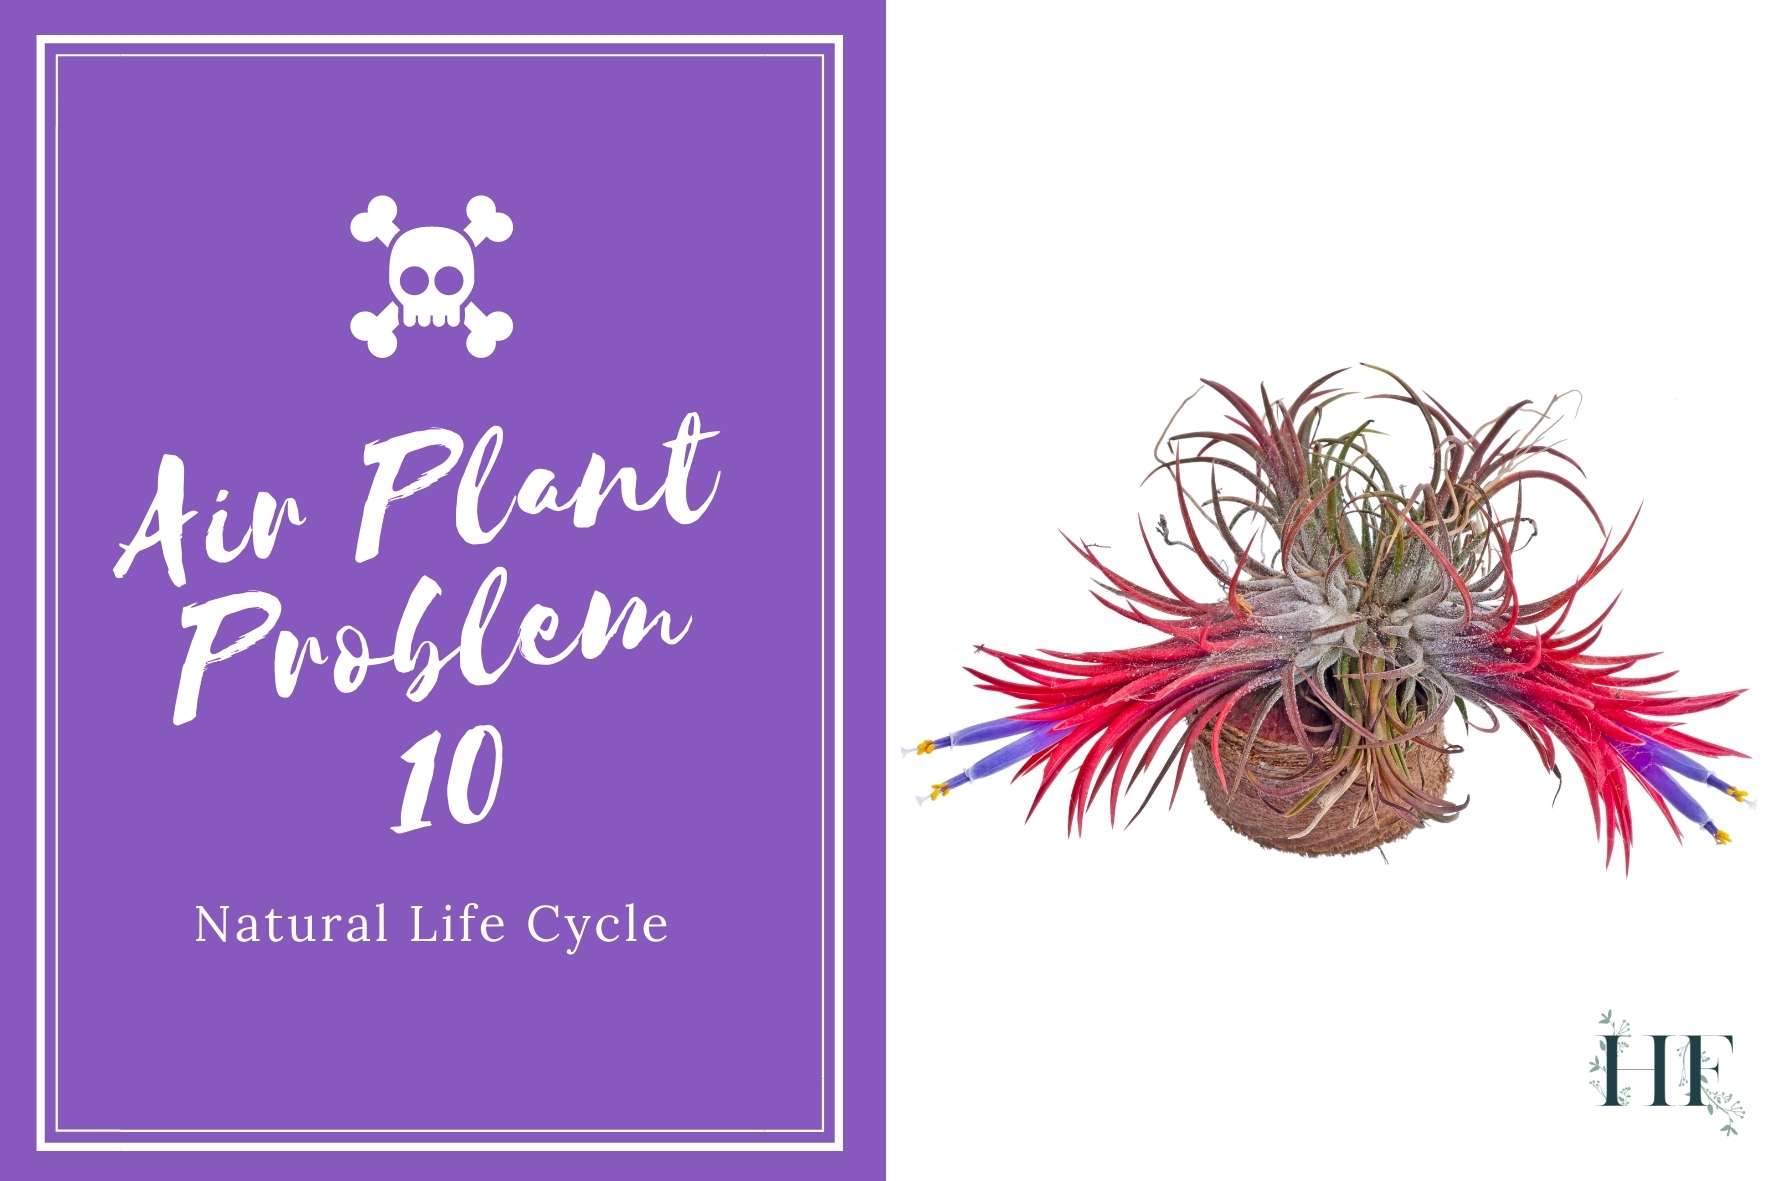
10) Natural Air Plant Life Cycle
If your air plant dies after flowering and producing offsets, it has reached the end of its natural life cycle. There’s nothing you can do at this point; nature has taken its course.
An air plant lifespan is between 2 to 5 years. Air plants are perennials, which means that they live for more than two years. Their life expectancy will be influenced by the Tillandsia species and growth conditions (environment, light, temperature, etc).
The life cycle of air plants includes growth, blooming, and reproduction by the pups and seedlings. Air plants bloom once during their lifetime and this blooming represents the peak of their life cycle – their maturity.
There are exceptions: smaller air plants like Ionanthas bloom a couple of times per year. But, eventually, the plant will focus its energy on producing small offsets.
Once they blossom, the flowers can last for several months, depending on the species. But, when the flowers start to fade and wilt, the air plant will start to perish. Before they die, air plants produce pups or offsets to continue the same growth cycle.
Read also: Air Plant Life Cycle, Reproduction and Growth Rate.
Air Plant Pests and Diseases
What if your Tillandsias have none of the problems listed above, then what’s killing your air plant?
Although Tillandsias generally don’t get affected by pests and diseases, air plants are only suspectable to fungi and parasites (mealybugs and scale insects).
Let’s see how to recognize them, avoid them (prevention plan), and how to get rid of them.
Insider Tip: Slugs and snails can also be a problem for air plants especially if they have been placed outside for the summer.
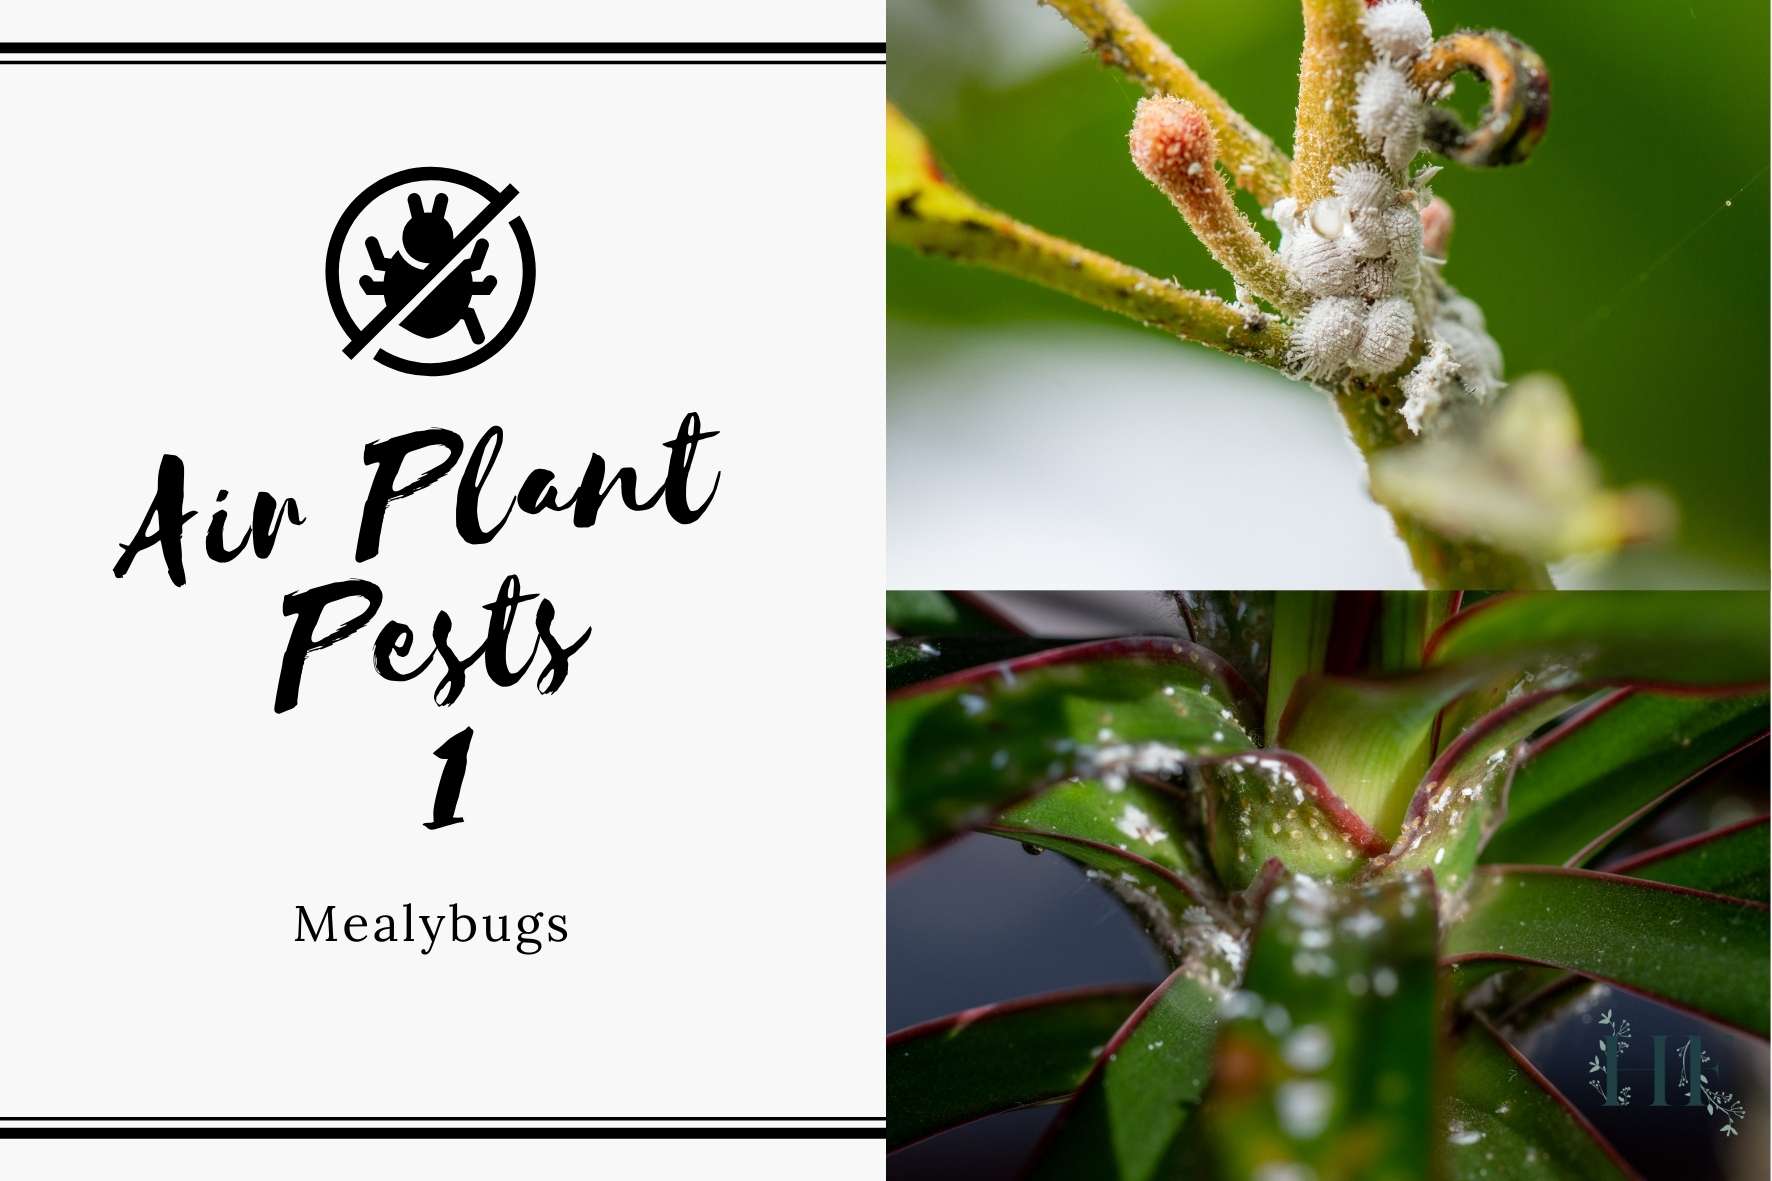
1) Mealybugs
Mealybugs are a very common pest that can be stubborn to eliminate. They feast on the plant’s sap, damaging the plants. You can find them in the areas where your stems and leaves meet.
Sign of Mealybugs on Air Plants
Common signs of mealybug pest infestation include:
- Air plant leaves turning yellow.
- Wilting, pale-yellow leaves that begin to fall off.
- White cottony, web-like substance on the plats (the actual insects).
- Ants on the plant (attracted by the wax coating).
- Black sooty substance on the leaves (it comes from ants that hunt for sweet-tasting honeydew produced by the mealybugs, the wax coating).
How to Get Rid Of Mealybugs on Air Plants
First of all, quarantine this plant from the others to minimize the chances of them spreading to your healthy plants.
There are a few things you can try to get rid of mealybugs.
Method A: Insecticidal Soap
- Pruning out light infestations.
- Cleaning your plant using a soap and water solution. You can dilute a tablespoon of unscented dish soap (I use this one, which is free of harsh ingredients) diluted in a gallon of water (4.5L). Then dip a soft cloth in the solution and clean off the mealybugs. You can also use a cotton swab to reach more enclosed areas of your air plant.
- Watch your plant for a couple of weeks for any signs of pests before returning it to its regular location. Repeat the process if necessary.
Method B: Ladybugs
You can also introduce dainty ladybugs to the terrarium where you display your air plant. They are natural enemies (predators) mealybugs and they will help to eradicate the pest.
Method C: Neem Oil
It helps with the disruption of the growth and development of mealybugs because it has repellent properties.
Disclaimer: I personally haven’t used either method B or C, but they are reported to work well.
Preventing Mealybugs on Air Plants
When watering air plants at home, do not overwater them or overfertilize them. Did you know that mealybugs are attracted to plants with a high level of nitrogen and fertilized grounds?
Also, you can ensure the plant’s hygiene by cleaning the leaves occasionally with a wet soft cloth. This will help avoid future infections.
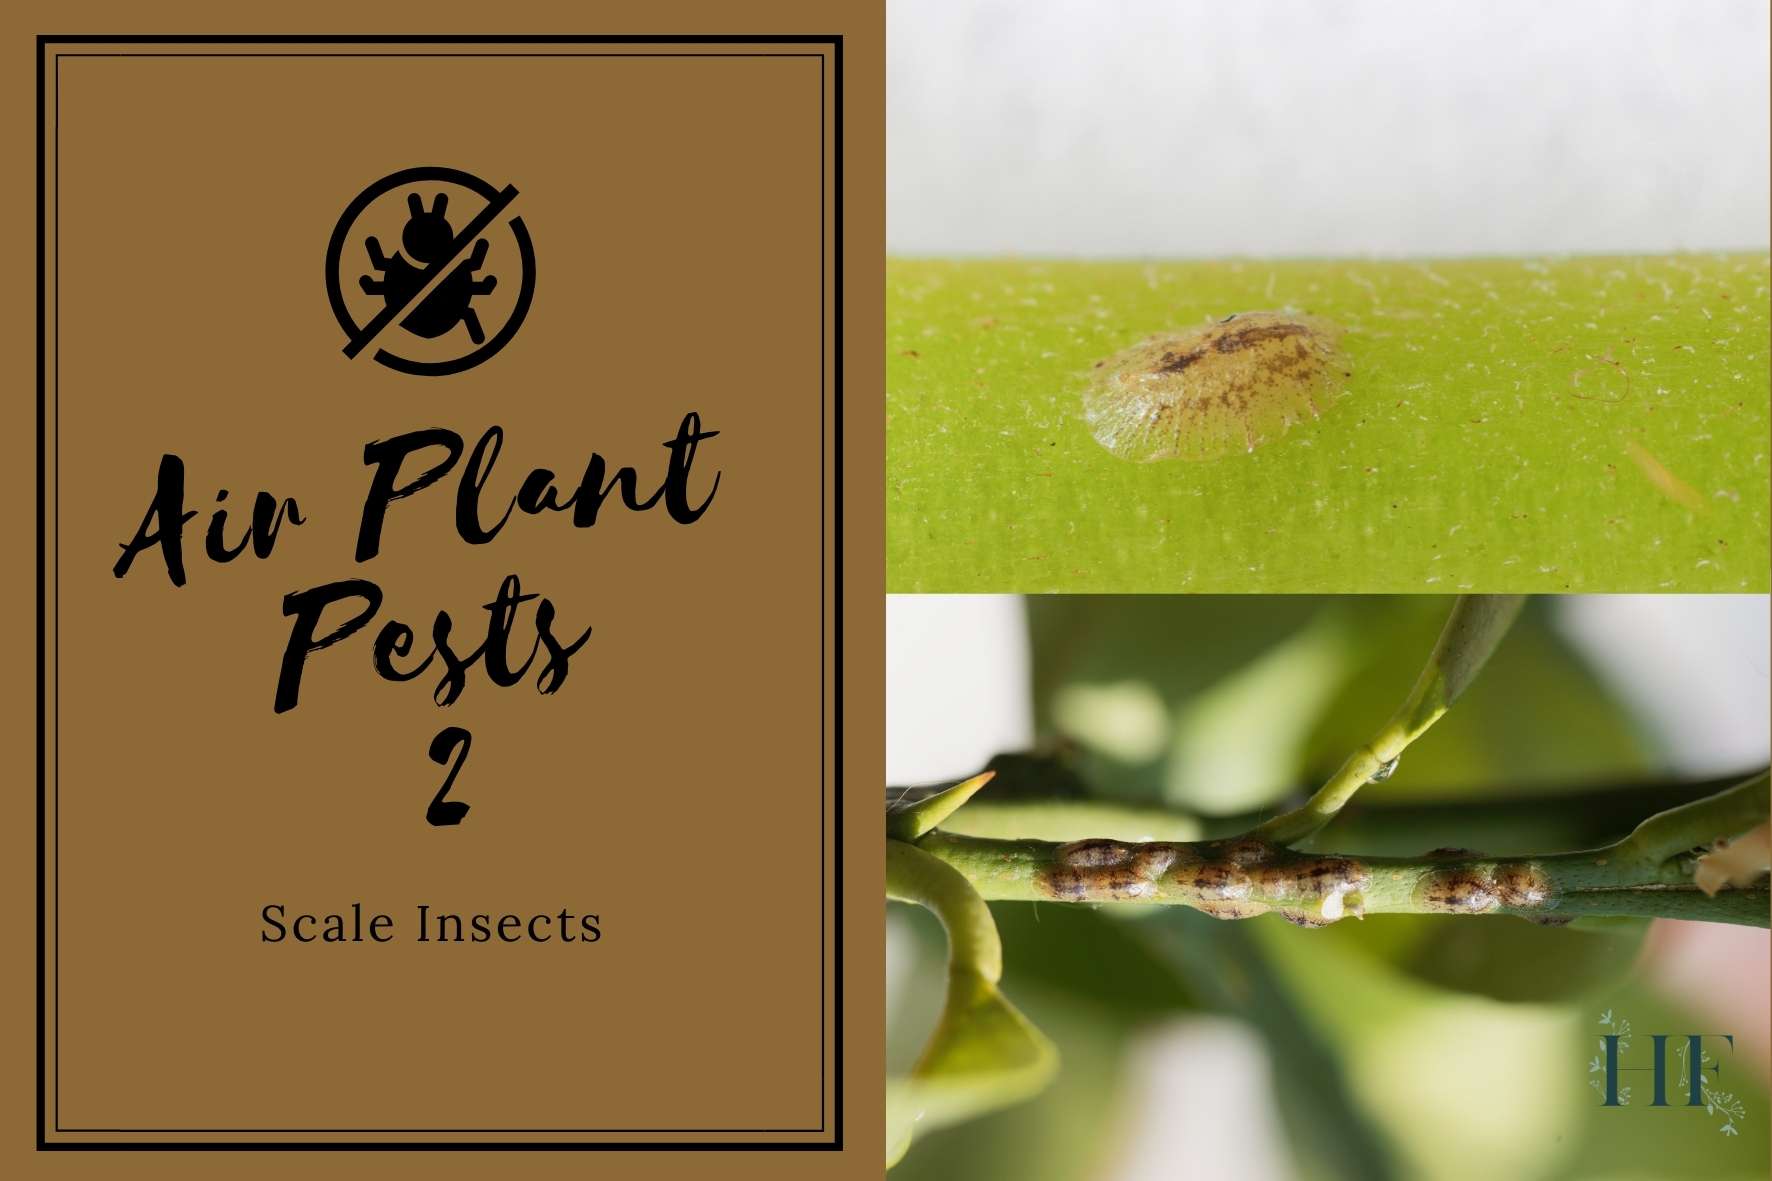
2) Scale Insects
Scale bugs are the second most common pesky bug. They can come for your air plants both in indoor and outdoor spaces. Like mealybugs, scale insects are quite obstinate.
Scale insects attach themselves to the underside of leaves and feed off of the plant.
Sign of Scale Insects on Air Plants
Common signs of scale insect pest infestation include:
- Tiny bumps on the underside of the leaves.
- Honeydew, which damages the plant and also attracts ants (like with mealybugs).
- Leaves yellowing and eventually falling off.
How to Get Rid of Scale Insects on Air Plants
Again, quarantine this plant from the others.
Then, you can use Method A (insecticidal soap) and Method C (neem oil) that I mentioned above to treat mealybugs to treat scale insects.
Preventing Scale Insects on Air Plants
As with any pest or disease, you can ensure your plant’s hygiene by cleaning the leaves occasionally with a wet soft cloth. This will help avoid future infections and help you spot them early.
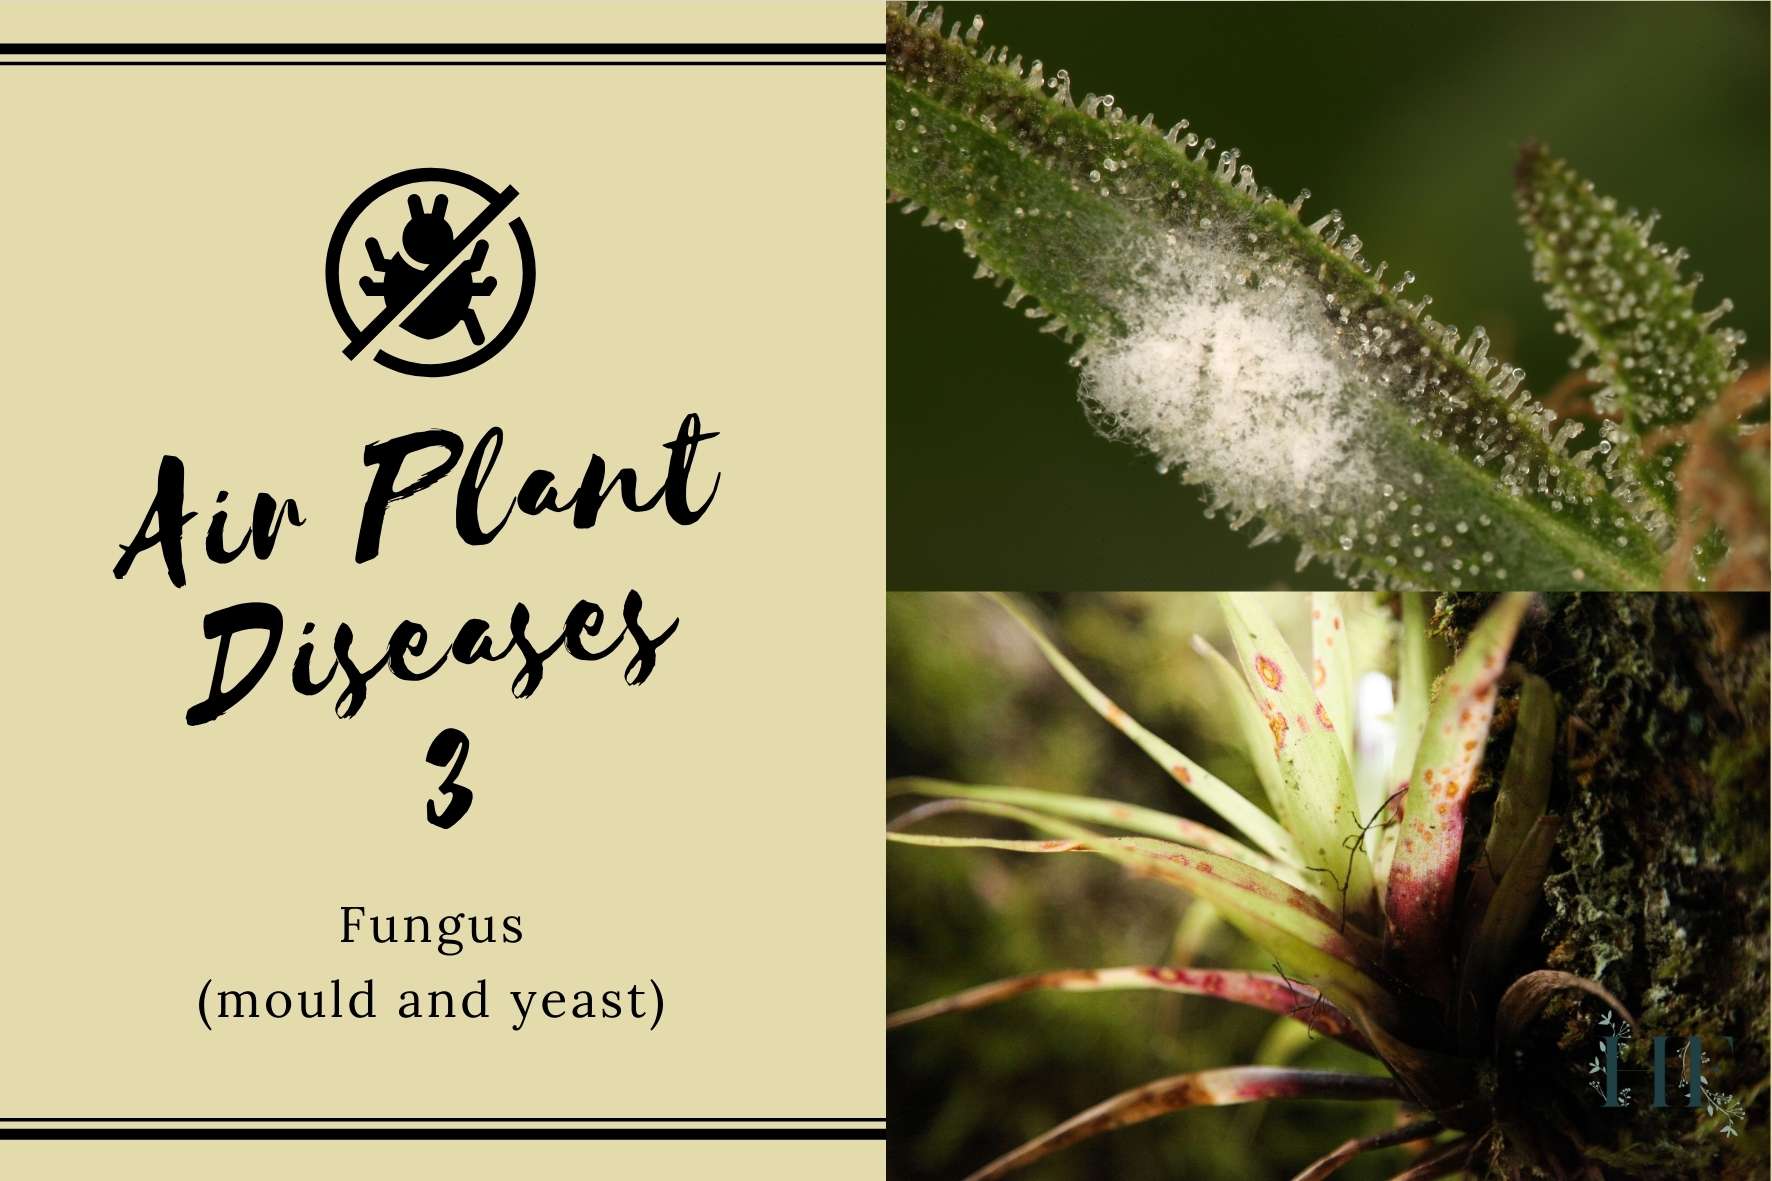
3) Fungus
The fungus can only exist in two main forms, which are yeast and mould.
- Yeast: They affect the roots.
- Mould: This micro-organism decomposes leaves, stems, and roots. Moulds are not visible to our naked eyes; you need a microscope.
Signs of Fungus on Air Plants
You may notice your air plant rotting or falling apart, this may be a result of fungus infection.
Signs of fungus include:
- Same sign as rot (refer to Air Plant Problems, Rot).
- Leaves turn yellowish with mild mould.
- When moulds grow numerous, the surface on which they are growing starts turning black.
How to Get Rid of Fungus on Air Plants
Once the root is affected, reversing its state may not be possible. However, cinnamon is a natural fungicide well known to reduce or stop fungus at the tips.
You have nothing to lose by sprinkling a bit on the air plant’s leaf tips.
Also, I have managed to recover plants with a bit of white mould by pruning the affected area and reducing the watering schedule afterwards.
Preventing Fungus on Air Plants
Rather than doing one thing, it’s more of a holistic approach when it comes to preventing fungus. You want to make sure that your air plant has the right amount of light, heat, air, water and nutrition.
Read also: Air Plant Care – 8 Steps to Grow and Keep Tillandsias Alive.